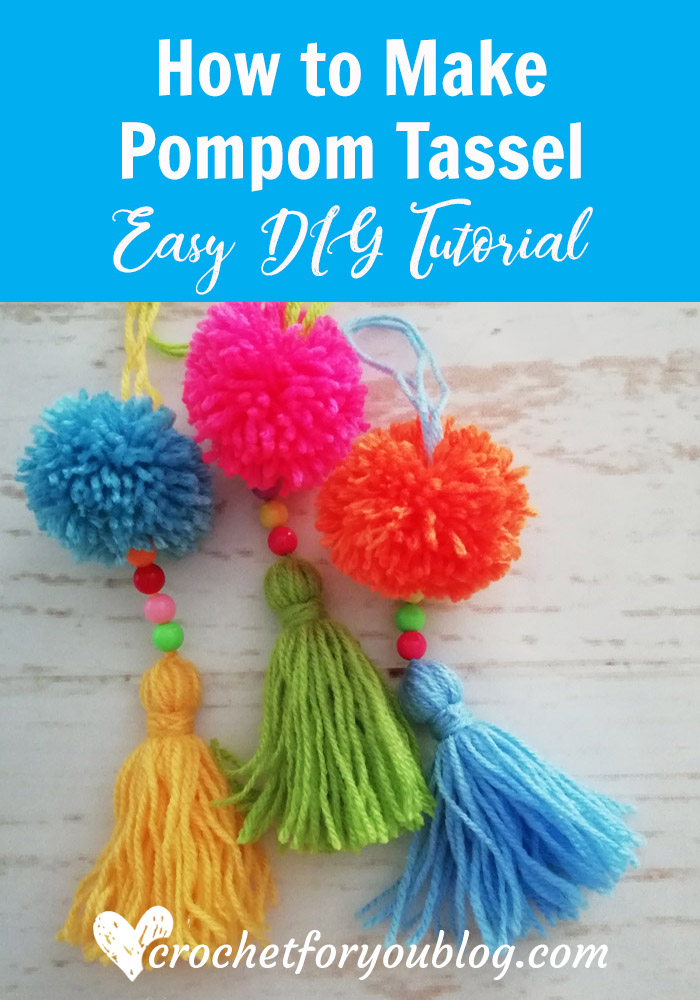
How to Make a Pompom Tassel
How to Make a Pompom Tassel Easy DIY Tutorial by Crochet For You
Happy Thursday my friends! 😀 I’m here to share another tutorial with you… but it is not about crochet. Today I’m sharing how to make your own pompom tassel.
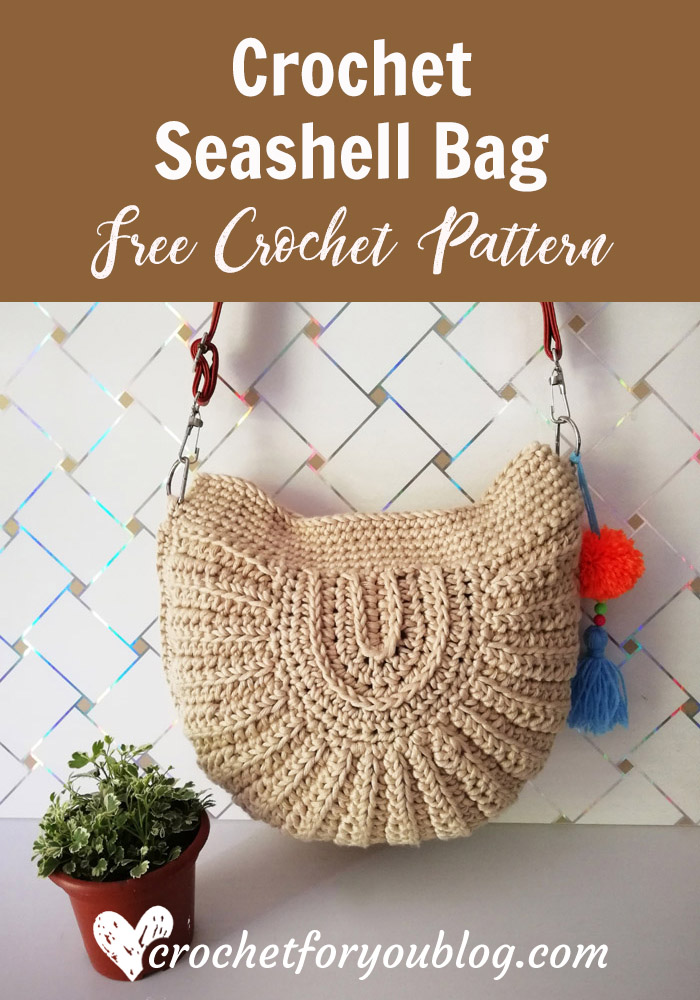
These days pompom and tassels seem to be great accessories for adorning. They are used in many ways on crochet projects too, for blankets, bags, pillows and more… So I wanted to add a pompom tassel for my crochet half circle bag that I’m going to share soon on the blog. 😉

So I made my own whimsical and colorful pompom tassels with beads. 😀 It was so much fun…. Ohh in this photo below, you can see my bag. And I wanted to select one pompom tassel for the bag. What do you think? Which pompom tassel matches to the bag?

Save on Pinterest
These colorful pompom tassels can be used in many ways on crochet projects. Perfectly match for crochet bags and keychain. I think these pompom tassels are also great for blankets and rugs if you made them without beads and with short tassels. 🙂
Materials you will need to make pompom tassel
- Yarns in any color and any weight but matches to pompom you select. (I used approx: 5 yards of DK yarns)
- 2 Tapestry needles that can be inserted through the bead’s hole you select.
- Pompom with yarn tails that used for tie pompom together. (I used 4.8cm)
- Beads (I used colorful, about 8mm size beads)
- Small scissors
- A piece of cardboard that has a height you want to make a tassel. (I used a yarn label of red heart soft.) 🙂

Step 1: Get a Piece of cardboard that has a height you want to make tassel (I used yarn label it was 3” height). Wrap the yarn around the piece of cardboard until you get desired length and cut. (I wrapped the yarn 43 times.)

Step 2: take a piece of yarn about 18” long in the same color and insert the yarn through tapestry needle. (When you select a needle, be careful to select a needle that can be inserted through the bead’s hole you selected)
Insert the needle under the yarns you wrapped and pull both ends to the cardboard top and make a double knot tightly. (do not cut both ends of yarns or remove the needle. We are going to use these yarn tails to insert beads and make a loop for hang)
(Please note that the photos for below I used 2 strands mistakenly. Use 1 strands instead of 2 strands of yarn.) 😉

Step 3: Cut the other ends of the tassel by inserting scissors between yarns and cardboard. After cut off the all you can remove the piece of cardboard.

Step 4: take another piece of yarn about 10” long in the same color. Hold the tassel just about 1cm below from the top of the tassel. And wrap the yarn a few times (5 or 8 times) around the tassel very tightly. Make a double knot using both ends.
Insert the end of the yarns tail through another needle and hide it under the tassel.

Trim the end of tassel to make it evener.

Tadaa… the tassel is made. 🙂 now we are going to attach beads and pompom.
Take pompom, beads, scissors, and tassel we just made.

Step 5: insert the tapestry needle of the tassel through beads. I used 4 beads in 4 colors.

Step 6: then insert the tapestry needle through the pompom. And get the needle out at the same place where the pompom yarn tail located. Keep a very little space for the yarn between beads and pompom but it will hide in pompom. We are going to make a knot there in the last step.

Step 7: Make a double knot using two ends of yarn tails of pompom and tassel. And only cut pompom yarn tail end just match to the pompom size.
Now you only have the tassel yarn tail with the needle. If you don’t want to make a loop for hanging you can just stop here.

Step 8: insert the needle again through the pompom at the same place we made a double knot. And get the needle out of the pompom just the same place that yarn tail inserts the pompom first time in step 6. You will see now there is a loop on the pompom top for hanging the tassel. Pull the yarn gently by adjusting the length you want for the loop.

Step 9: in this step I made another double knot for more secure the pompom tassel. As I told you in step 6, make a double knot tightly using that little space between beads and pompom.
And insert the needle through 2 or 3 beads to hide yarn end. Cut the yarn very closely to the beads then the yarn end will hide in the beads.
Yaay…. That’s all. Now you have a beautiful and colorful pompom tassel that can be used in many ways. 🙂


Hope to see you soon with a new tutorial! 
Until then, Happy Crafting!!
Can’t wait to see your finished projects. Share your finished projects of this
Happy hooking with Crochet For You!!
Let’s connect and share facebook | Google+ | Pinterest | Twitter | Newsletter
All contents include photography and patterns are copyrighted Crochet For You by Erangi Udeshika.
Do not copy, edit, distribute or republish patterns and images in this blog in part or whole as your own. Please, share a direct link to the pattern with others and anywhere else. You are welcome to make and sell finished items using my patterns.