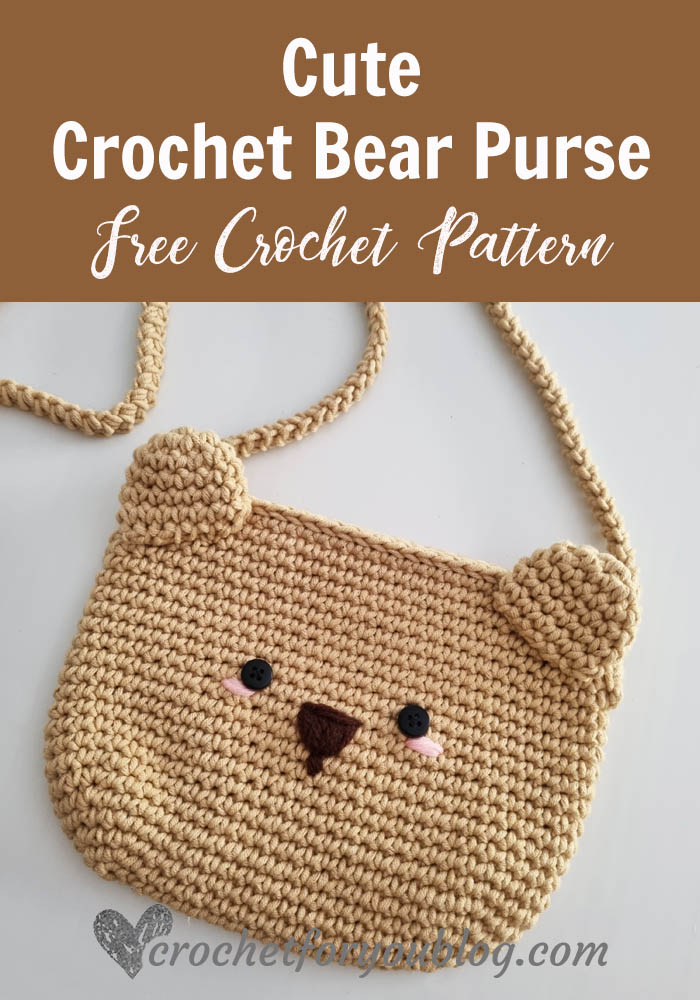
Cute Crochet Bear Purse Free Pattern
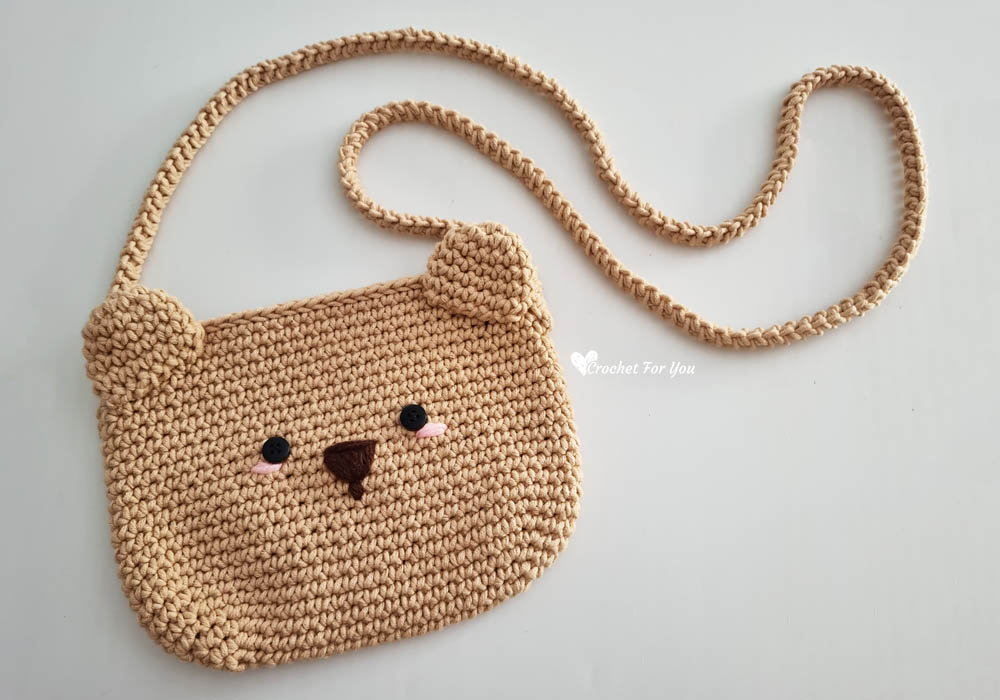
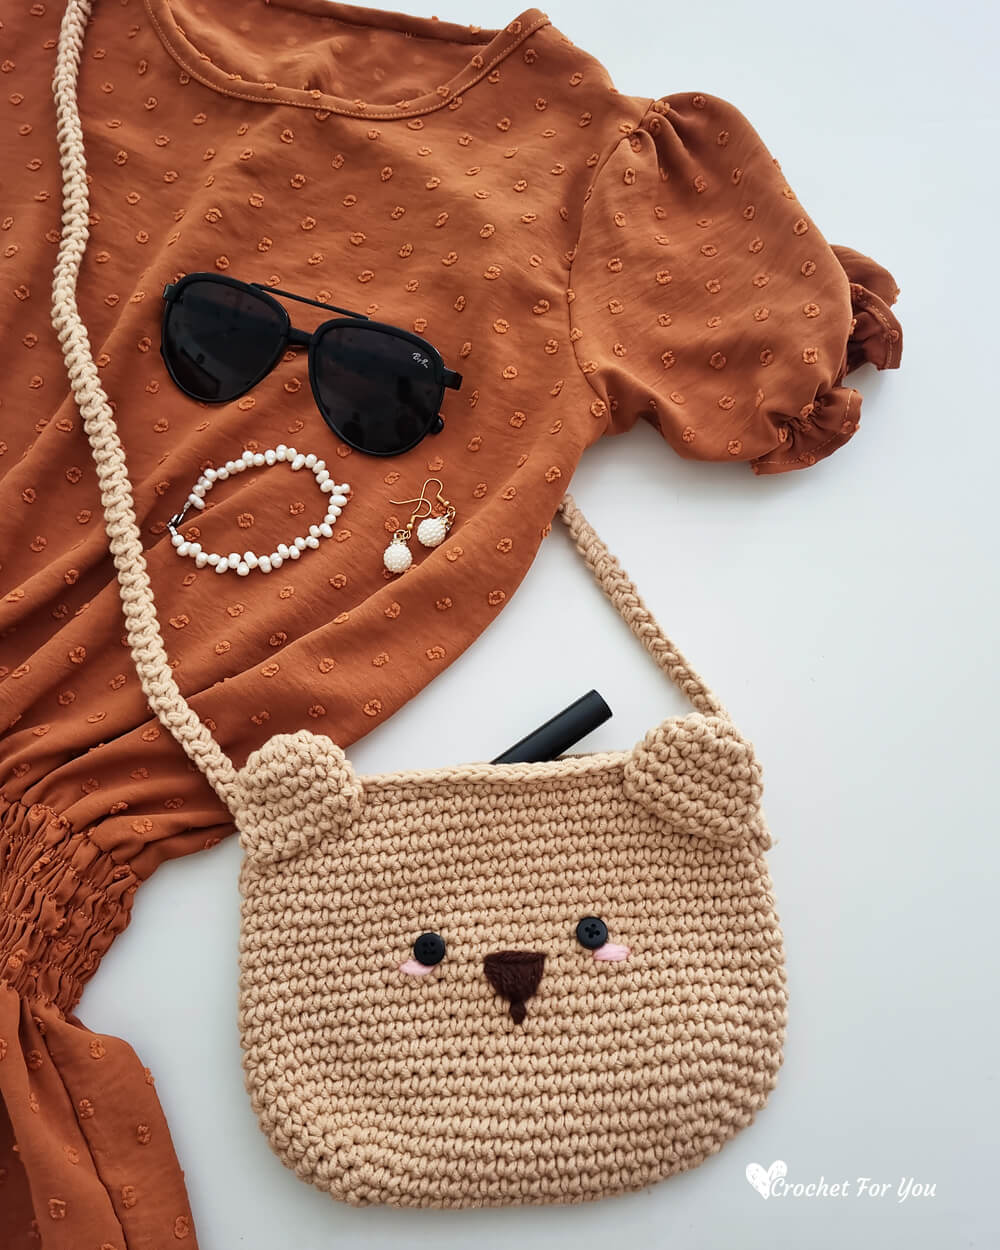
This cute crochet bear purse is the perfect mini size purse for all your summer outings. Perfect for girls of all ages. It’s big enough to carry your phone, lipstick and other small essentials. This cute kawaii style crochet bear purse can be worn as a crossbody bag. It is great as a gift for little girls.
Add this pattern to Ravelry queue
Save on Pinterest
The Crochet bear purse is easy and fun to crochet. This is a one skein crochet project that works up quickly. I hope you love it. Make for yourself or as a gift.
Skill Level: Easy
Finished size: 8″ x 6″
Materials
Yarn: #4 Medium / Worsted weight / Cotton blend yarn
I used
– 1 skein of Ice Yarn Lorena Worsted Cafe Latte (55% Cotton, 45% Acrylic; 174 yards [160 meters] / 100g)
Hook:
– (US) H-8/5 mm crochet hook for bag
– (US) I-9/5.5 mm crochet hook for ears
– Tapestry needle
– 2 black buttons for eyes (10mm)
– Black thread and needle for attaching buttons
– Stitch markers
– Small amount of brown and pink color yarns for making nose and cheeks
– Scissors
Gauge: 15 sc x 15 rows = (4” x 4”) with (US) H-8/5 mm crochet hook.
Abbreviations (US Term)
- ch = chain
- sc = single stitch
- sl st = slip stitch
- st = stitch
- beg = beginning
- * to = repeat * to the instructions.
- [ ] = work instructions within brackets as many times as directed
Special stitch
- sc2tog = crochet 2 sc together (Insert the hook and draw up a loop in each of next 2 stitches, yarn over, pull back through all 3 loops on hook at once)
Notes
- Do not join after each round.
- Always attach the stitch markers on the first st in each round.
- The Romanian cord is used as the bag’s strap, it is crocheted separately and attached to the purse lastly. As an option, you can use leather handles, too.
- I followed the Make And Do Crew video tutorial to make Romanian cord.
Crochet Bear Purse Pattern
With (US) H-8/5 mm crochet hook and (MC), ch 17 +1
Round 1: 3 sc in second ch from the hook, sc in each of next ch 15, 3 sc in last ch, working on the opposite side of the foundation chains, sc in each of next ch 15. (36 sts)
Round 2: 2 sc in each of next 3 st, sc in each of next 15 st, 2 sc in each of next 3 st, sc in each of next 15 st. (42 sts)
Round 3: sc in next st, 2 sc in next st, [sc in next st, 2 sc in next st] 2 times, sc in each of next 15 sts, [sc in next st, 2 sc in next st] 3 times, sc in each of next 15 st. (48 sts)
Round 4: sc in next st, 2 sc in next st, [sc in each of next 2 st, 2 sc in next st] 2 times, sc in next st, sc in each of next 15 st, sc in next st, [2 sc in next st, sc in each of next 2 st] 2 times, 2 sc in next st, sc in next st, sc in each of next 15 st. (54 sts)
Round 5: sc in each of next 3 st, 2 sc in next st, sc in each of next 4 st, 2 sc in next st, sc in each of next 3 st, sc in each of next 15 st, sc in each of next 3 st, 2 sc in next st, sc in each of next 4 st, 2 sc in next st, sc in each of next 3 st, sc in each of next 15 st. (58 sts)
Round 6: sc in each of next 3 st, 2 sc in next st, sc in each of next 6 st, 2 sc in next st, sc in each of next 3 st, sc in each of next 15 sts, sc in each of next 3 st, 2 sc in next st, sc in each of next 6 st, 2 sc in next st, sc in each of next 3 st, sc in each of next 15 st. (62 sts)
Round 7 – 19: sc in each st around. (62 sts)
Round 20: sc in each of next 11 st, sc2tog, sc in each of next 29 st, sc2tog, sc in each of next 18 st. (60 sts)
Round 21: sc in each of next 10 st, sc2tog, sc in each of next 28 st, sc2tog, sc in each of next 18 st. (58 sts)
Round 22: sc in each of next 9 st, sc2tog, sc in each of next 27 st, sc2tog, sc in each of next 18 st. (56 sts)
Round 23: ch 1, sc in each of next 8 st, sc2tog, sc in each of next 26 st, sc2tog, sc in each of next 18 st. (54 sts)
Round 23: sc in each st around, (54 sts)
Round 24: crochet slip stitch around. Fasten off and weave the end.
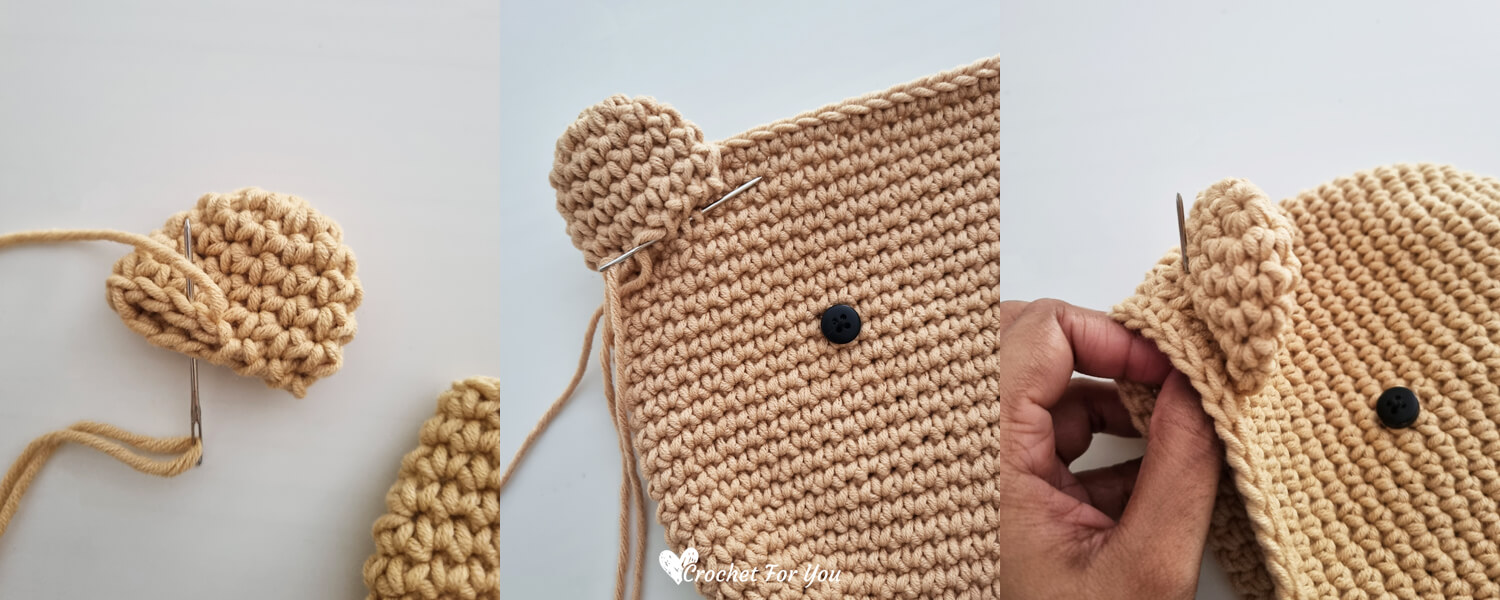
Ears (make 2)
With (US) I-9/5.5 mm crochet hook, Make an adjustable ring,
Round 1: 6 sc into the ring, (6 sts)
Round 2: 2 sc in each st around, (12 sts)
Round 3: sc in each of next 11 st, 2 sc in next st. (13 sts)
Round 4: 2 sc in next st, sc in each st around (14 sts)
Round 5: sc in each of next 13 st, 2 sc in next st. (15 sts)
Round 6: sc in each st around. (15 sts)
Fasten off and cut the yarn leaving about 18″ long yarn tail. Sew the open with the yarn tail.
Assembly
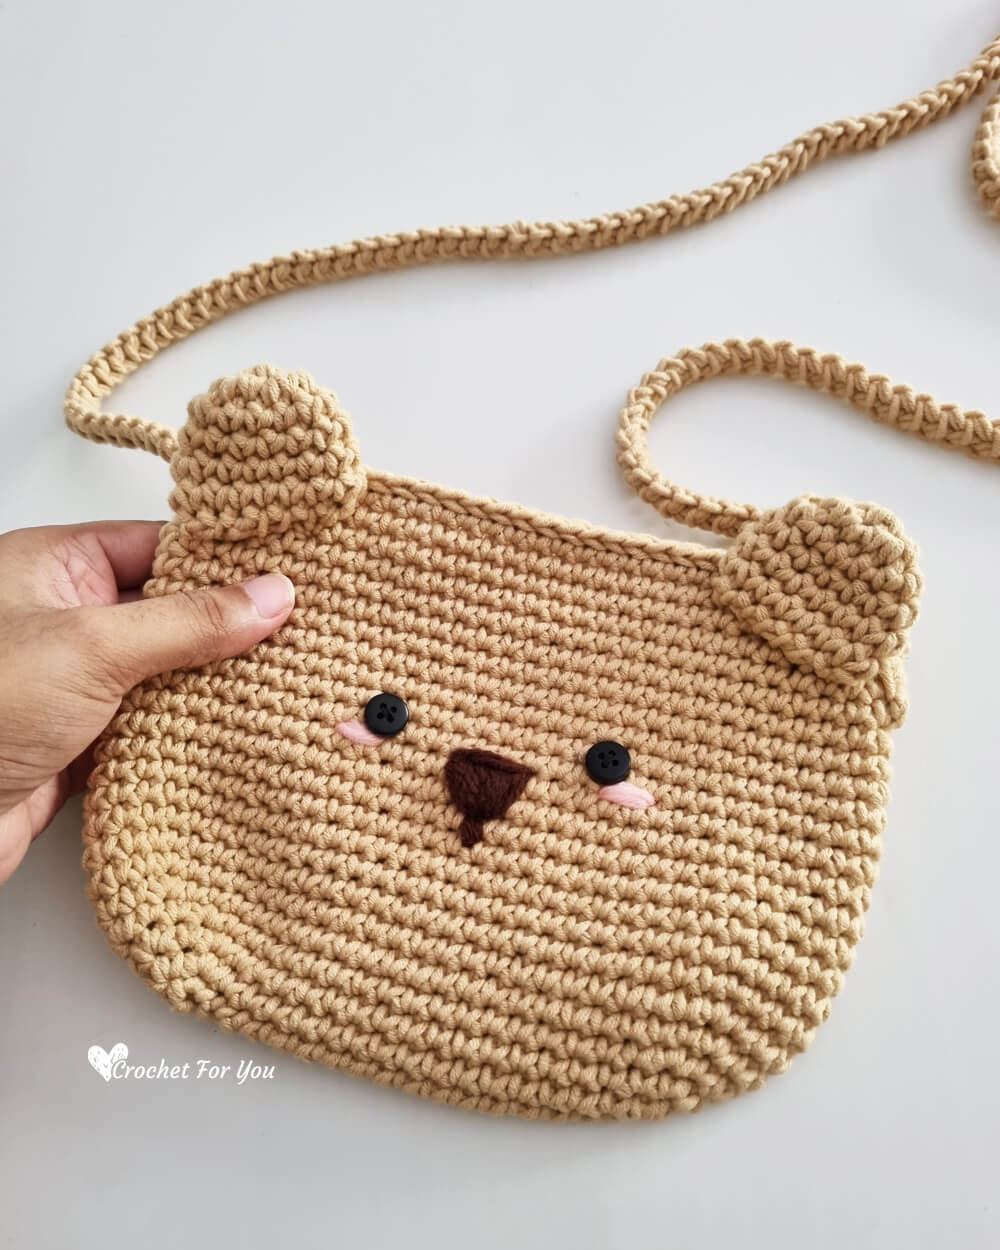
- With black thread and the needle, sew buttons between 14 & 15 rounds about 8 stitches apart. (fold the purse in half and find the center)
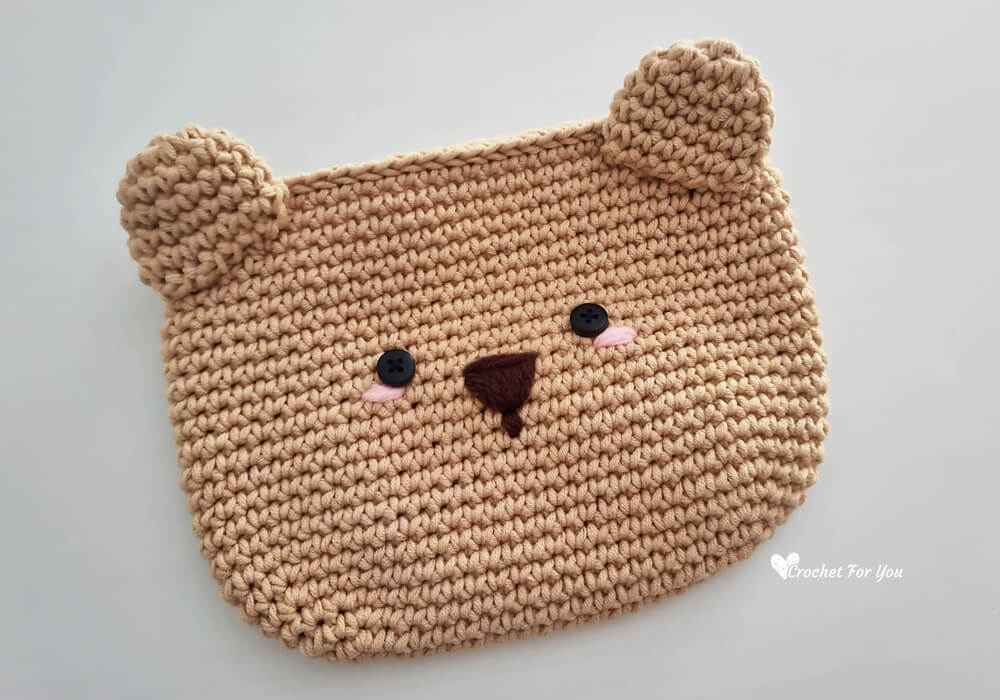
- With brown color yarn and the tapestry needle, embroider the nose between round 10 & 13, just below the eyes.
- With pink color yarn, embroider cheeks just below the eyes. (I make few straight lines)
- Sew ears on each side of the purse. Between rounds 20 & 23. (see the photo below) And make few more stitches in the center, from the back side of the ear to keep the ear sturdy. (3rd photo below)

Strap
I crocheted Romanian cord and attached to the purse lastly.
I followed the Jess Coppom’s video tutorial from makeanddocrew.com. The video tutorial was very helpful and clear to me to understand how to crochet Romanian Cord (Click here for the video tutorial).
When crocheting Romanian cord for the purse
- Remember to work stitches loosely.
- It was hard to count the stitches on the cord so I pay attention to the length of the strap while crocheting.
- I made 45″ long straps for my purse, you can make it shorter or longer if you want.
- When starting and finishing the strap, remember to leave 8″ or 10″ yarn tail to sew the strap.
- Finally, sew strap to the purse using yarn tails of the strap.
If you want to make it more sturdy you can add a fabric lining and zipper.
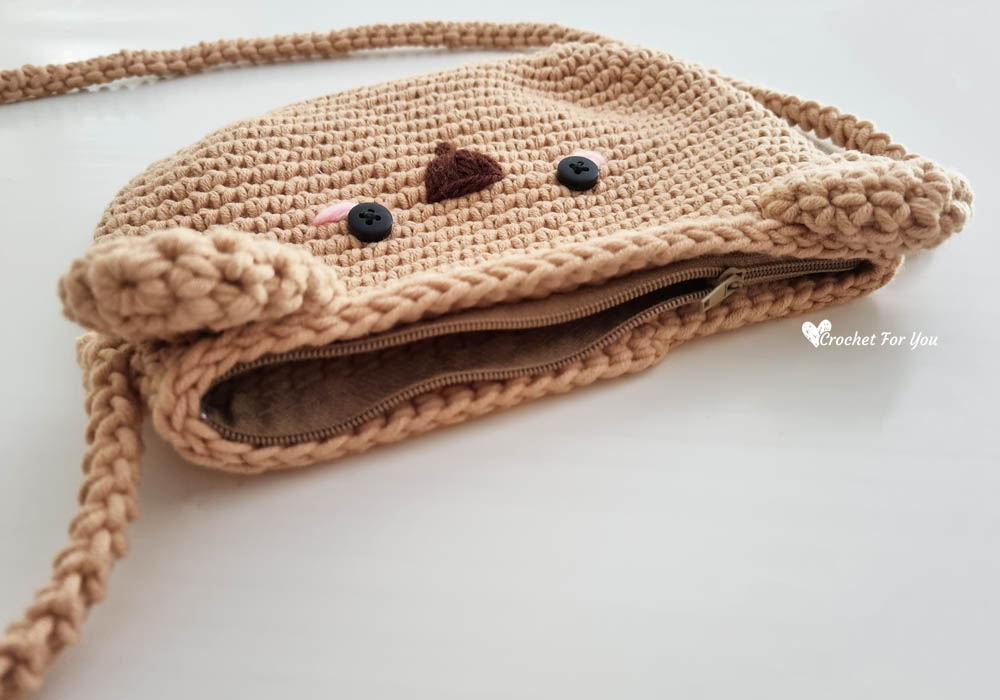
Sew zipper and lining to the purse.
Sew the zipper to the purse. Cut the lining piece to match with the measurements of the purse, leaving extra 0.5″ for seam allowances. And fold the fabric in half (right side facing inside) and sew the sides.
Turn the right side out of the lining. And the wrong side out of the crochet purse. Insert the crochet purse into the lining. Add pins first and sew with the backstitch. After sewing the lining to the purse, turn inside out. Check out Crochet N Craft – Lining a Crochet Purse and learn more about how to add lining to the bag.

Hope to see you soon with a new FREE pattern
Until then, Happy Crocheting!!
Share your finished projects of this pattern on Crochet For You FB page.
Happy hooking with Crochet For You!!
Let’s connect and share
Facebook| Pinterest | Twitter | Instagram
All contents include photography and patterns are copyrighted Crochet For You by Erangi Udeshika.
Do not copy, edit, distribute or republish patterns and images in this blog in part or whole as your own. Please, share a direct link to the pattern with others and anywhere else. You are welcome to make and sell finished items using my patterns.
Visit Copyright / Terms of use for more info.