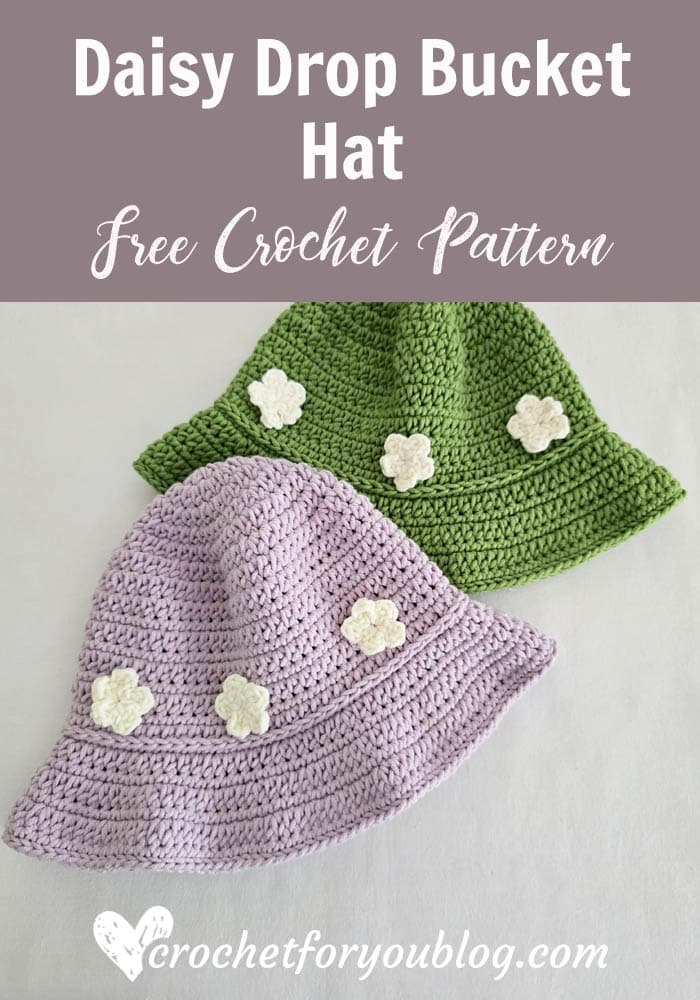
Daisy Drop Crochet Bucket Hat Free Pattern
This Daisy Drop Crochet Bucket Hat is made with basic crochet stitches. The little white flowers around the brim add an aesthetic, simple look to the hat that is perfect for breezy spring mornings, sunny afternoons, or weekend market strolls.

Add this pattern to Ravelry queue
Save on Pinterest
Watch the video Tutorial Below

The Daisy Drop Bucket hat available in two sizes—an teen (adult small) size crocheted in a chic, solid color (shown here in earthy green and soft lavender), and a playful child size designed with eye-catching stripes (shown in classic blue and white).
The hat follows a standard hat sizing guide so you can easily customize and make this hat in any size you need. Find more info in the pattern’s note section!
Each hat is beautifully finished with sweet, small white crochet daisy appliqués scattered around the body of the hat just above the brim to give it a soft, feminine look. Find the YouTube Shorts for the flower applique.
This bucket hat designed with a gently sloping brim, it’s the ultimate sunny-day accessory for trips to the park, beach days, or casual everyday wear.

Skill level: Easy
Finished sizes:
- Child = Crown 5.5 / 16-17″ circumference / 7″ height with brim
- Teen (Adult Small) = Crown 6.25 / 19-20″ circumference / 8.5″ height with brim
Materials: 4-Medium / Worsted / Cotton blend / Approx: 170 yards
(I used)
- 1 skein of Ice Yarn Lorena Worsted, Green, Light Lilac for each adult size hat.
- US H-8 / 5mm crochet hook
- Tapestry needle for weaving ends
- Scissors
Gauge: 15 sc x 15 rows = (4” x 4”) with H-8, 5mm crochet hook.
Abbreviations / special stitches (US Term)
- ch = chain
- sl st = slip stitch
- sc = single crochet
- hdc = half double crochet
- dc = double crochet
- st = stitch
- ch-sp = chain- (number of chains) space
- beg = beginning
- *to ; = repeat * to the instructions
- (C1) = Color 1
- (C2) = Color 2
Special stitches
- Single crochet in 3rd loop = instead of working crochet stitches in top loops of the previous round, you should find a 3rd loop on the wrong side or back side of the crochet piece. This 3rd loop is located on the wrong side just under the top 2 loops. Start to make a single crochet stitch you want as normal way. When inserting hook into the loop in the previous row just skipped the top 2 loops and turn a crochet piece forward and insert the hook in 3rd loop, Finish the stitch as normal.
Notes:
– Beg ch does not count as a stitch.
– The hat works top to bottom featuring basic stitches, half double crochet and single crochet stitches.
– If you want to make this hat in larger or smaller sizes, Follow the hat sizing guide-How to Crochet Hat in Any Size to make this hat in any size.
– For other sizes: after you get the closest number to the size of the crown width you want. Continue the body part in this pattern until you reach the hat height you need.
– Make brim last.
– And attach flowers around just above the brim. Video for simple flower applique.

Daisy Drop Crochet Bucket Hat Pattern
Teen (Adult Small) size

Crown
With (MC) yarn, make an adjustable ring
Round 1: ch 1, 10 hdc into the ring, join with sl st in first hdc. (10 sts)
Round 2: ch 1, 2 hdc in each st around, join with sl st in first hdc. (20 sts)
Round 3: ch 1, 2 hdc in first st, *hdc in next st, 2 hdc in next st; repeat * to around, join with sl st in first hdc. (30 sts)
Round 4: ch 1, 2 hdc in first st, *hdc in each of next 2 st, 2 hdc in next st; repeat * to around, join with sl st in first hdc. (40 sts)
Round 5: ch 1, 2 hdc in first st, *hdc in each of next 3 st, 2 hdc in next st; repeat * to around, join with sl st in first hdc. (50 sts)
Round 6: ch 1, 2 hdc in first st, *hdc in each of next 4 st, 2 hdc in next st; repeat * to around, join with sl st in first hdc. (60 sts)
Round 7: ch 1, 2 hdc in first st, *hdc in each of next 5 st, 2 hdc in next st; repeat * to around, join with sl st in first hdc. (70 sts)
Body of the hat
Round 8: ch 1, hdc in each st around, join with sl st in first hdc.
Round 9: ch 1, sc in each st around, join with sl st in first sc.
Round 10 to 15: repeat round 8 and 9 continuously.
Round 16: ch 1, hdc in each st around, join with sl st in first hdc.
Round 17: ch 1, sc in 3rd loop in each st around, join with sl st in first sc.
Brim
Round 18: ch 1, 2 hdc in first st, *hdc in each of next 4 st, 2 hdc in next st; repeat * to around, join with sl st in first hdc. (84 sts)
Round 19: ch 1, sc in each st around, join with sl st in first sc.
Round 20: ch 1, 2 hdc in first st, *hdc in each of next 3 st, 2 hdc in next st; repeat * to around, join with sl st in first hdc. (105 sts)
Round 21: ch 1, sc in each st around, join with sl st in first sc.
Round 22: ch 1, 2 hdc in first st, *hdc in each of next 4 st, 2 hdc in next st; repeat * to around, join with sl st in first hdc. (126 sts)
Round 23: ch 1, sc in each st around, join with sl st in first sc.
Final round: sl st in each st around. Fasten off and weave the end.

Watch the video tutorial for flower applique
Crochet FLower (make 6)
With white color yarn, make an adjustable ring
Round 1: [Ch 2, dc into the ring, ch 2, sl st into the ring] 5 times, fasten off and cut the yarn leaving about 6” long.
Insert the tapestry needle through the yarn tail and attach the flowers on round 14, about 11 stitches apart from each other

Child Size
Materials: (I used)
- Half a skein of each Ice Yarn Lorena Worsted, Jeans Blue (C1) and Cream (C2)
- US H-8 / 5mm crochet hook
- Tapestry needle for weaving ends
- Scissors
Crown
With (C1) yarn, make an adjustable ring
Round 1: ch 1, 10 hdc into the ring, join with sl st in first hdc. (10 sts)
Round 2: with (C2), ch 1, 2 hdc in each st around, join with sl st in first hdc. (20 sts)
Round 3: with (C1), ch 1, 2 hdc in first st, *hdc in next st, 2 hdc in next st; repeat * to around, join with sl st in first hdc. (30 sts)
Round 4: with (C2), ch 1, 2 hdc in first st, *hdc in each of next 2 st, 2 hdc in next st; repeat * to around, join with sl st in first hdc. (40 sts)
Round 5: with (C1), ch 1, 2 hdc in first st, *hdc in each of next 3 st, 2 hdc in next st; repeat * to around, join with sl st in first hdc. (50 sts)
Round 6: with (C2), ch 1, 2 hdc in first st, *hdc in each of next 4 st, 2 hdc in next st; repeat * to around, join with sl st in first hdc. (60 sts)
Body of the hat
Round 7: with (C1), ch 1, hdc in each st around, join with sl st in first hdc.
Round 8: ch 1, sc in each st around, join with sl st in first sc.
Round 9 & 10: with (C2), repeat round 7 and 8.
Round 11 & 12: with (C1), repeat round 7 and 8.
Round 13: with (C2), ch 1, hdc in each st around, join with sl st in first hdc.
Round 14: ch 1, sc in 3rd loop in each st around, join with sl st in first sc.
Brim
Round 15: with (C1), ch 1, 2 hdc in first st, *hdc in each of next 4 st, 2 hdc in next st; repeat * to around, join with sl st in first hdc. (72 sts)
Round 16: ch 1, sc in each st around, join with sl st in first sc.
Round 17: with (C2), ch 1, 2 hdc in first st, *hdc in each of next 3 st, 2 hdc in next st; repeat * to around, join with sl st in first hdc. (90 sts)
Round 18: ch 1, sc in each st around, join with sl st in first sc.
Round 19: with (C1), ch 1, sc in each st around, join with sl st in first sc.
Final round: sl st in each st around. Fasten off and weave the end.
Crochet FLower (make 6)
With white color yarn, make an adjustable ring
Round 1: {Ch 2, dc into the ring, ch 2, sl st into the ring] 5 times, fasten off and cut the yarn leaving about 6” long.
Insert the tapestry needle through the yarn tail and attach the flowers on round 14, about 11 stitches apart from each other
Watch the Video Tutorial


Hope to see you soon with a new FREE pattern
Until then, Happy Crocheting!!
Share your finished projects of this pattern on Crochet For You FB page.
Happy hooking with Crochet For You!!
Let’s connect and share
Facebook | Pinterest | Youtube | Instagram
All contents include photography and patterns are copyrighted Crochet For You by Erangi Udeshika.
Do not copy, edit, distribute or republish patterns and images in this blog in part or whole as your own. Please, share a direct link to the pattern with others and anywhere else. You are welcome to make and sell finished items using my patterns.
Visit Copyright / Terms of use for more info.
Thank you.