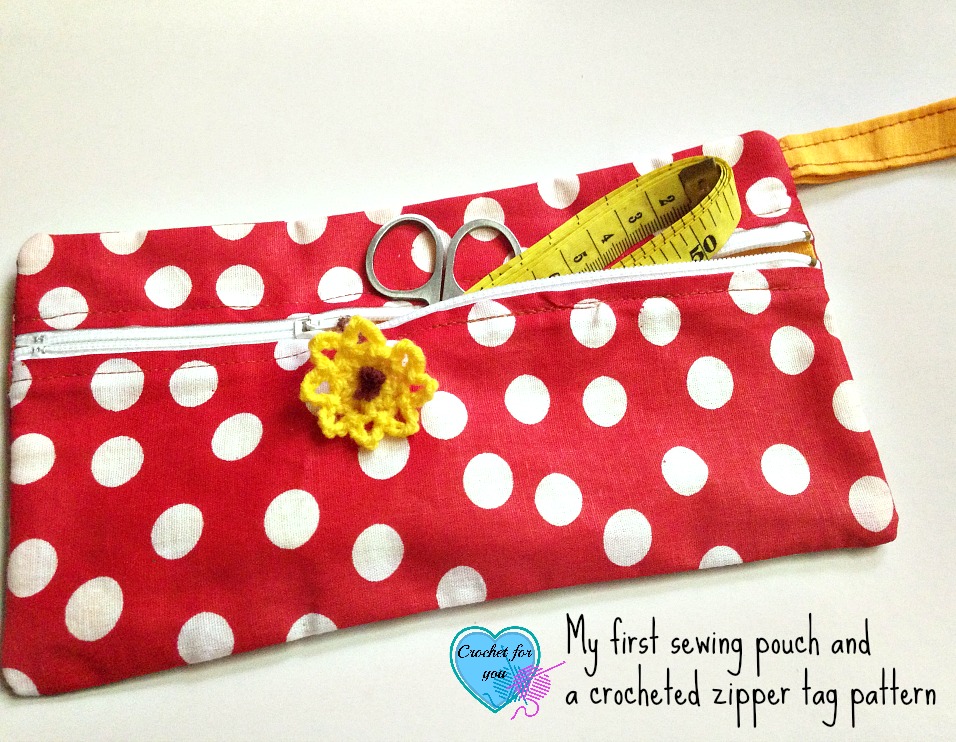
A pouch I made with Craftsy free class plus simple crochet zipper tag pattern
Happy weekend to you all! Hope you had a wonderful week.
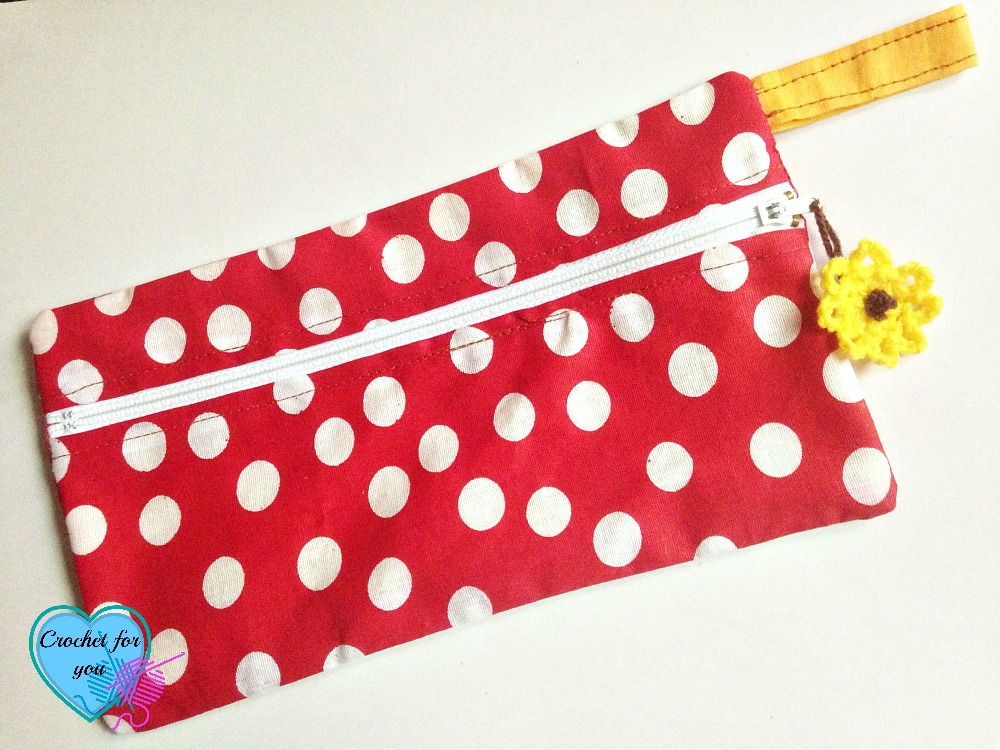
I had a fun time with sewing things after a long time. Here is the little zipper pouch I made to keep my tools safe. The zipper head is too small, so I crocheted a little zipper tag as well. You can see the pattern for the crochet zipper tag below.
Disclosure: This post may contain affiliate links.
Sometimes I can’t find my crochet hooks. My scissors, stitch markers, ruler, needles are everywhere when I start to crochet something. These goodies want a spot for keeping in one place. Plus, this pouch grabbed my eyes at once. It’s cute and handy.
This zipper pouch video tutorial is in a Craftsy free mini class Bag Making Basics. This is a first bag making class that I enrolled and it’s free.

Bag-Making Basics: Reversible Tote & Zipper Pouch with Kristin Link. In this class, you can learn 2 bag patterns Reversible Tote and Zipper Pouch.
The two most reason I love this pouch is
1. It does not get more fabric to make. I had a leftover fabric that my mom bought for a frock herself. Actually, I only had to buy a zipper in white color. I could collect other materials around my home.
- This is a free mini class on Craftsy. So I do not want to pay any extra money for the class.
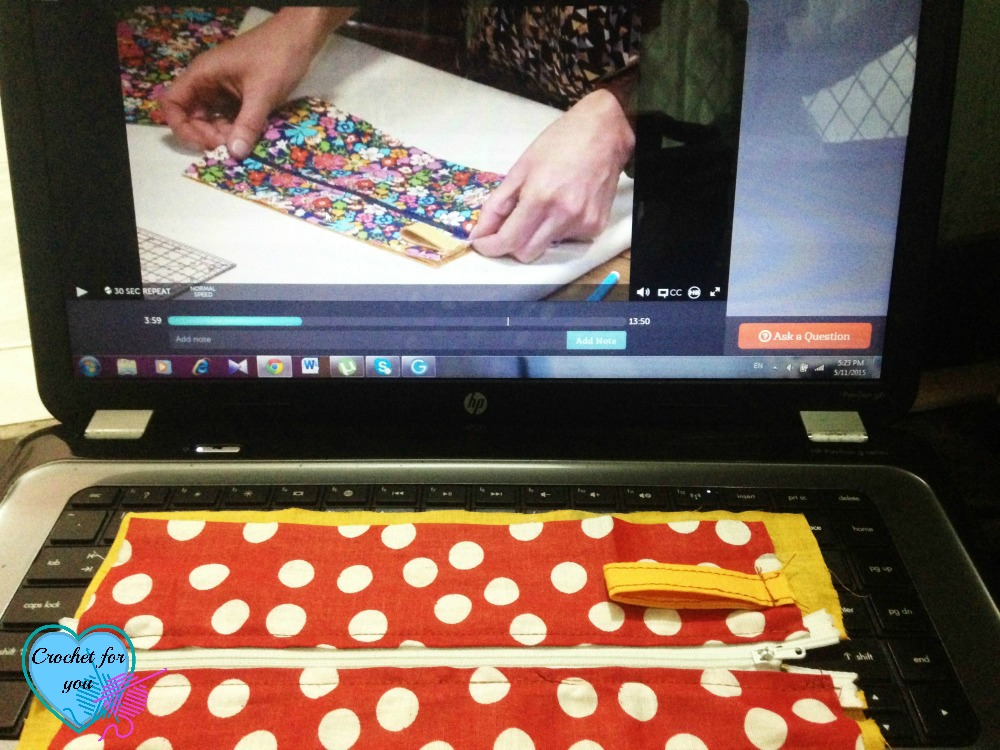
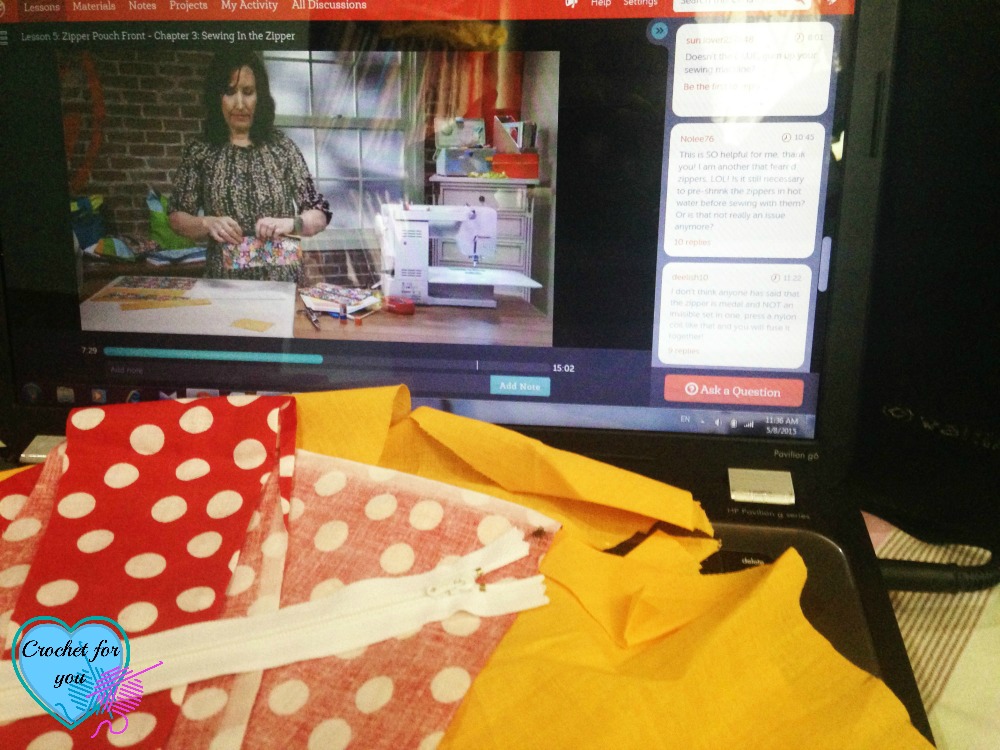
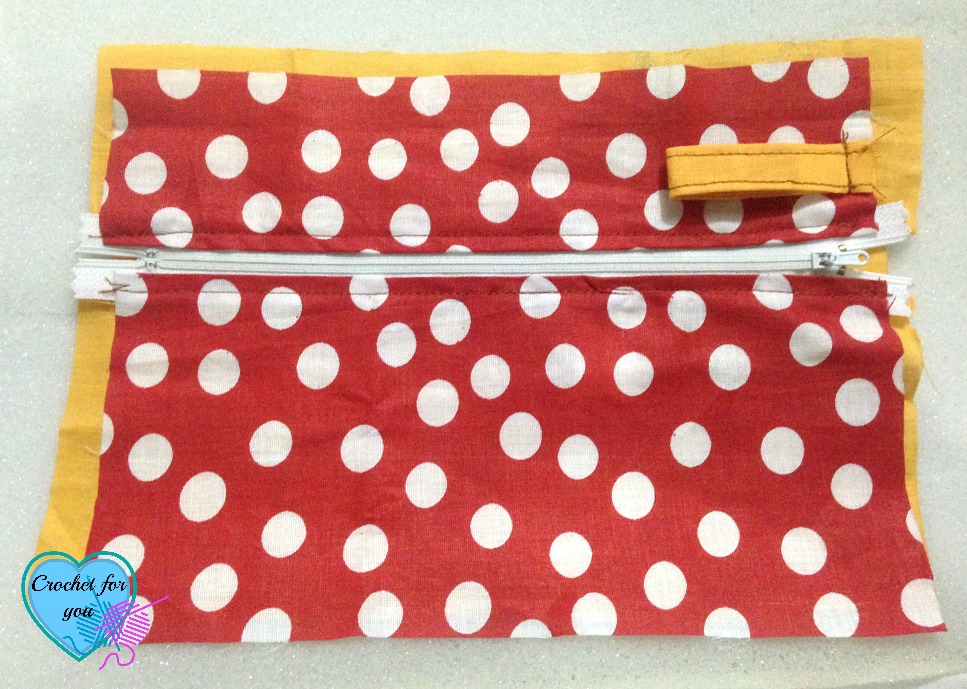 Kristin Link is amazing and very talented. Look at the photo above, I captured while I am watching the class and while sewing my pouch. You can see the class playing on my laptop screen and my half-finished pouch on the keyboard. Her pouch edges are very neat and straight. I need some more practice and experience. I cut the pieces outside of the cutting lines because I worried about my first pouch would not come nicely. After attaching the zipper I cut and removed extra edges along the cutting lines.
Believe me, after assembling back side pieces, you have to turn the project 2 times to get right side out. My mom was looking at me when I do this and she said it’s like a magic.
Tadaa… Here is my finished pouch.
Now I want to make a Bucket bag and a drawstring bag for keeping my yarns and WIP’s. Bag-Making Basics: Drawstring Bag & Bucket Bag. This class also free Craftsy class by Kristin Link.

Are you more interested about making bags??. Check out all of these class on Craftsy.
Crochet Zipper Tag – free pattern
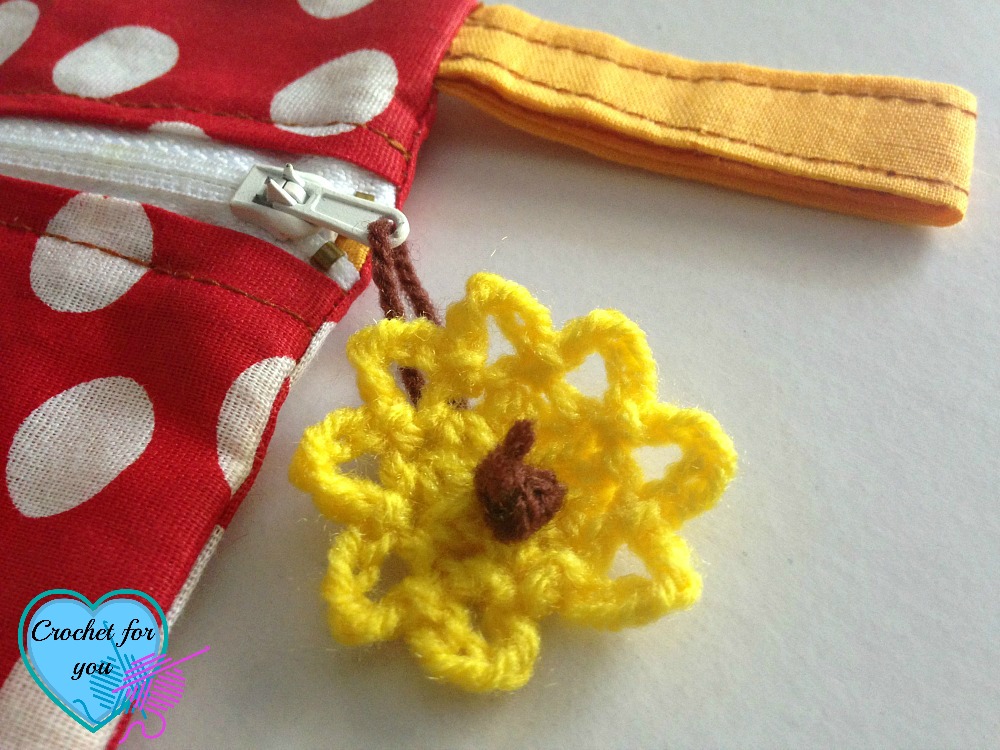
The zipper head is too small to hold so I crocheted a simple flower like a star flower.
Materials
You will need small amount of yarns in 2 colors. (I used yellow color for flower and brown color strand about 6” long)
pattern
make a magic ring
ch 2, 8 hdc in ring, sl st to first hdc.
*ch 5, sl st to next st* repeat *to* around, fasten off and weave the ends.
Take a 6” long strand in brown color and insert through the hole in zipper head. Insert the two ends of the strand through the hole in the middle of the flower and make tie a little bit large knot.