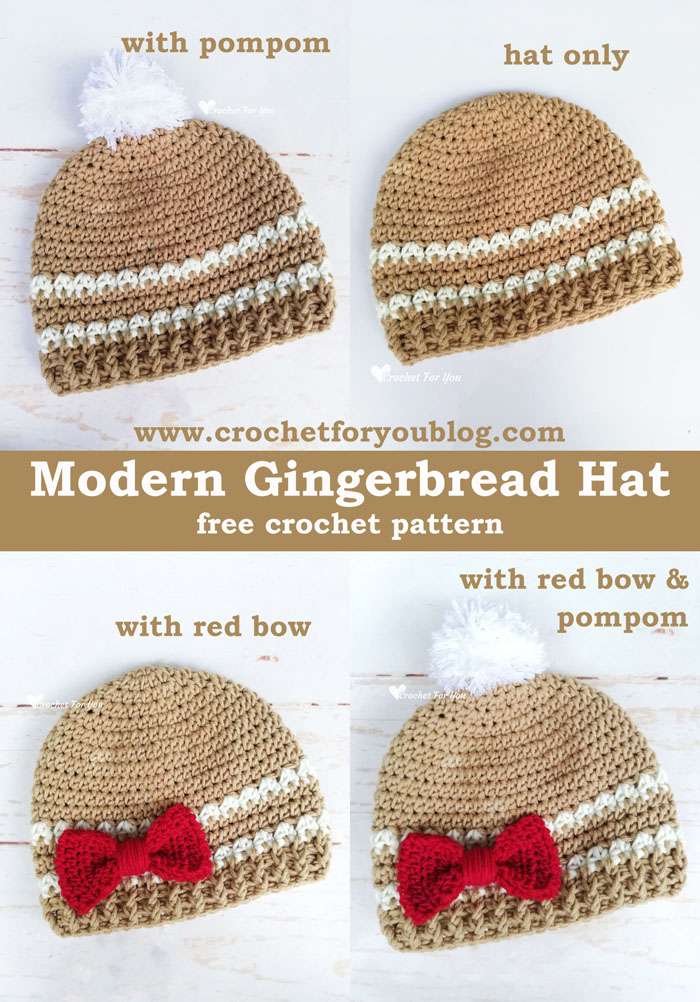
Crochet Modern Gingerbread Hat Free Pattern
Crochet Modern Gingerbread Hat Pattern by Crochet For You.
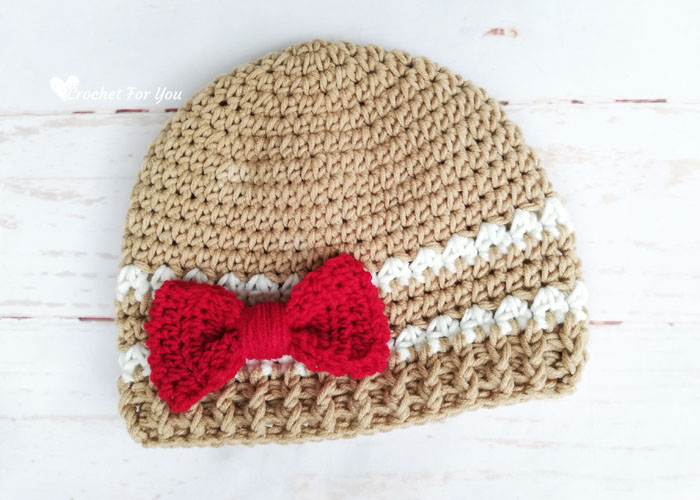
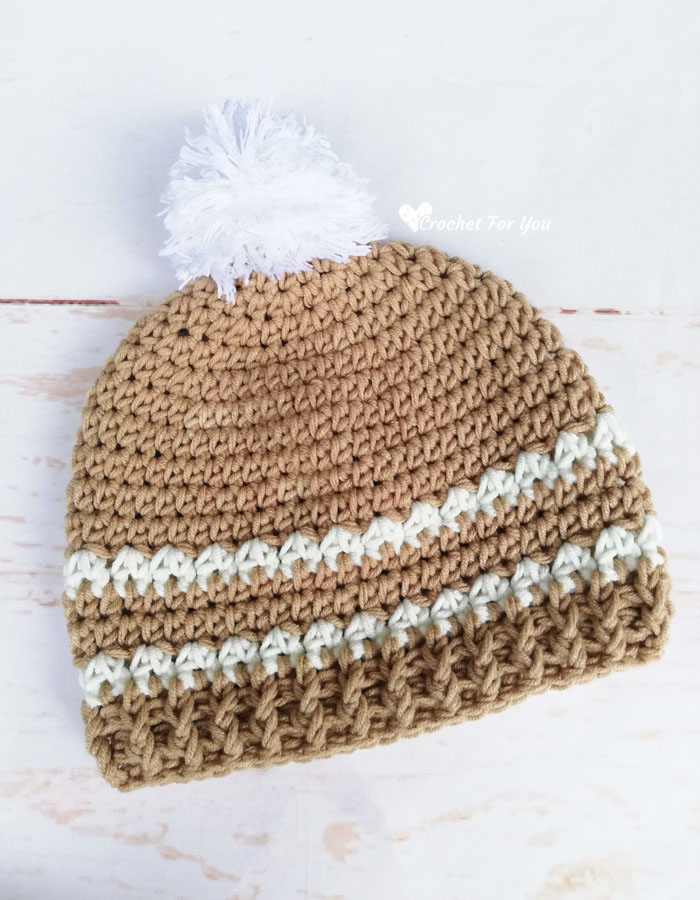
Here is my version of the gingerbread hat. Rather than making a traditional hat design with the face of gingerbread I made this as a unisex hat to go with modern style. Add white stripes, bow and pompom. This hat is unisex and can be made in any size. 😀
The gingerbread hat made in toddler size. Follow the hat sizing guide-How to Crochet Hat in Any Size to make this hat in any size. Find more info in the note section and the pattern section too.
You can be more creative when adding embellishment to the hat. If you want to make this hat for a girl add a red bow between white rows. And pompom gives a winter and cozy look to the hat. With and without pompom and red bow, I styled this hat in 4 ways (scroll down to the bottom of the pattern see all 4 styles)
Add this pattern to Ravelry queue
Save on Pinterest
Skill level: Easy
Finished size (1-3 toddler – but can be adjusted to any size)
- Hat height = 7” (without pompom)
- Hat circumference = 16
Materials: #4-Medium / Worsted yarn (Approx: 150 yards)
(I used)
- Brown color yarn (Approx: 125 yards)
- White color yarn (Approx: 25 yards)
- I-9 / 5.5mm crochet hook
- Tapestry needle for weaving ends.
- Optional: pompom and red yarns (Approx: 25 yards) to make a bow. (I used DK weight and 5mm crochet hook)
Gauge: 13 hdc x 9 rows = 4″ with I-9 / 5.5mm crochet hook
- Abbreviations/special stitches
- ch = chain
- sl st = slip stitch
- hdc = half double crochet
- fpdc = front post double crochet
- bpdc = back post double crochet
- st = stitch
- ch-sp = chain space
- yo = yarn over
- beg = beginning
- (C1) = color 1 (brown)
- (C2) = color 2 (white)
- *to; = repeat * to the instructions.
- Special stitches
- V stitch: (hdc, ch 1, hdc) in indicated st.
- Notes:
- beg ch does not count as st.
- if you want to make this hat in larger or smaller sizes, Follow the hat sizing guide-How to Crochet Hat in Any Size to make this hat in any size.
- For other sizes: after you get the closest number to the size of the crown width you want. Continue the body part until you reach the hat height you need.
- Make two white stripes where you want in the last 7 rounds. And ribbed edging in the last two rounds.
Crochet Gingerbread Hat Pattern
(crown)
Make an adjustable/magic ring with (C1).
Round 1: ch 1, 8 hdc into the ring, sl st to the first hdc. (8 sts)
Round 2: ch 1, 2 hdc in first st and each of next st around, sl st to the first hdc. (16 sts)
Round 3: ch 1, 2 hdc in first st, *hdc in next st, 2 hdc in next st; repeat to around, sl st to the first hdc. (24 sts)
Round 4: with (C2) ch 1, 2 hdc in first st, *hdc in next 2 sts, 2 hdc in next st; repeat * to around, sl st to the first hdc. (32 sts)
Round 5: ch 1, 2 hdc in first st, *hdc in next 3 sts, 2 hdc in next st; repeat * to around, sl st to the first hdc. (40 sts)
Round 6: ch 1, 2 hdc in first st, *hdc in next 4 sts, 2 hdc in next st; repeat * to around, sl st to the first hdc. (48 sts)
Round 7: with (C1) ch 1, 2 hdc in first st, *hdc in next 5 sts, 2 hdc in next st; repeat * to around, sl st to the first hdc. (56 sts)
For other sizes:
– Follow the hat sizing guide-How to Crochet Hat in Any Size)
– After you get the closest number to the size of the crown width you want.
– Continue the body part until you reach the hat height you need.
– Make two white stripes where you want in the last 7 rounds.
– And ribbed edging in the last two rounds.
(body)
Round 8: ch 1, hdc in first st and each st around, sl st to the first hdc. (56 sts)
Round 9 to 11: repeat round 8.
Round 12: with (C2), ch 1, V-st in first st, *sk next st, V-st in next st; repeat * around, sl st to the first hdc. (28 v-sts)
Round 13: with (C1) ch 1, hdc in first st, hdc in next ch-sp, sk next hdc, *hdc in next st, hdc in next ch-sp, sk next hdc; repeat * around, sl st to the first hdc. (56 sts)
Round 14: with (C1) repeat round 8.
Round 15: repeat round 12.
Round 16: repeat round 13.
Ribbed edging
Round 17: ch 2, fpdc in first st, *bpdc in next st, fpdc in next st; repeat * to around, sl st to the first st. (56 sts)
Round 18: repeat round 17. Fasten off and weave ends.
Red Bow
- Notes:
- you can use some red color leftover yarns to make this bow. (I used DK weight and 5mm crochet hook)
- Finished size of the bow: 4″ wide
ch 9
Row 1: hdc in 2nd ch from the hook, hdc in each st across, turn. (8 hdc)
Row 2: ch 1, hdc in first st and each st across, turn. (8 hdc)
Row 3 to 20: repeat row 2. Cut the yarn leaving about 25″ long yarn tail and sew the two short sides together to make like a loop.
Finishing
Pinch at the middle of the bow and start wrapping the remaining yarn tail around the middle of the bow tightly. When finish the wrapping insert the tapestry needle through the yarn and sew a few stitches to secure the yarn end.
Hope to see you soon with a new FREE pattern
Until then, Happy Crocheting!!
Share your finished projects of this pattern on Crochet For You FB page.
Happy hooking with Crochet For You!!
Let’s connect and share
Facebook | Pinterest | Twitter | Instagram
All contents include photography and patterns are copyrighted Crochet For You by Erangi Udeshika.
Do not copy, edit, distribute or republish patterns and images in this blog in part or whole as your own. Please, share a direct link to the pattern with others and anywhere else. You are welcome to make and sell finished items using my patterns.
Visit Copyright / Terms of use for more info. Thank you.