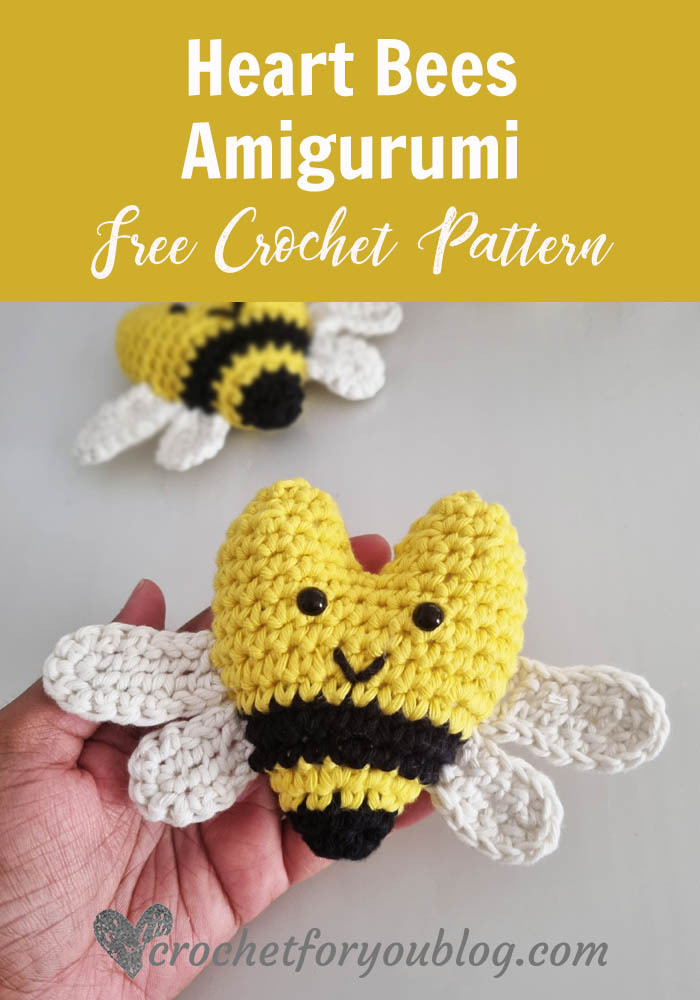
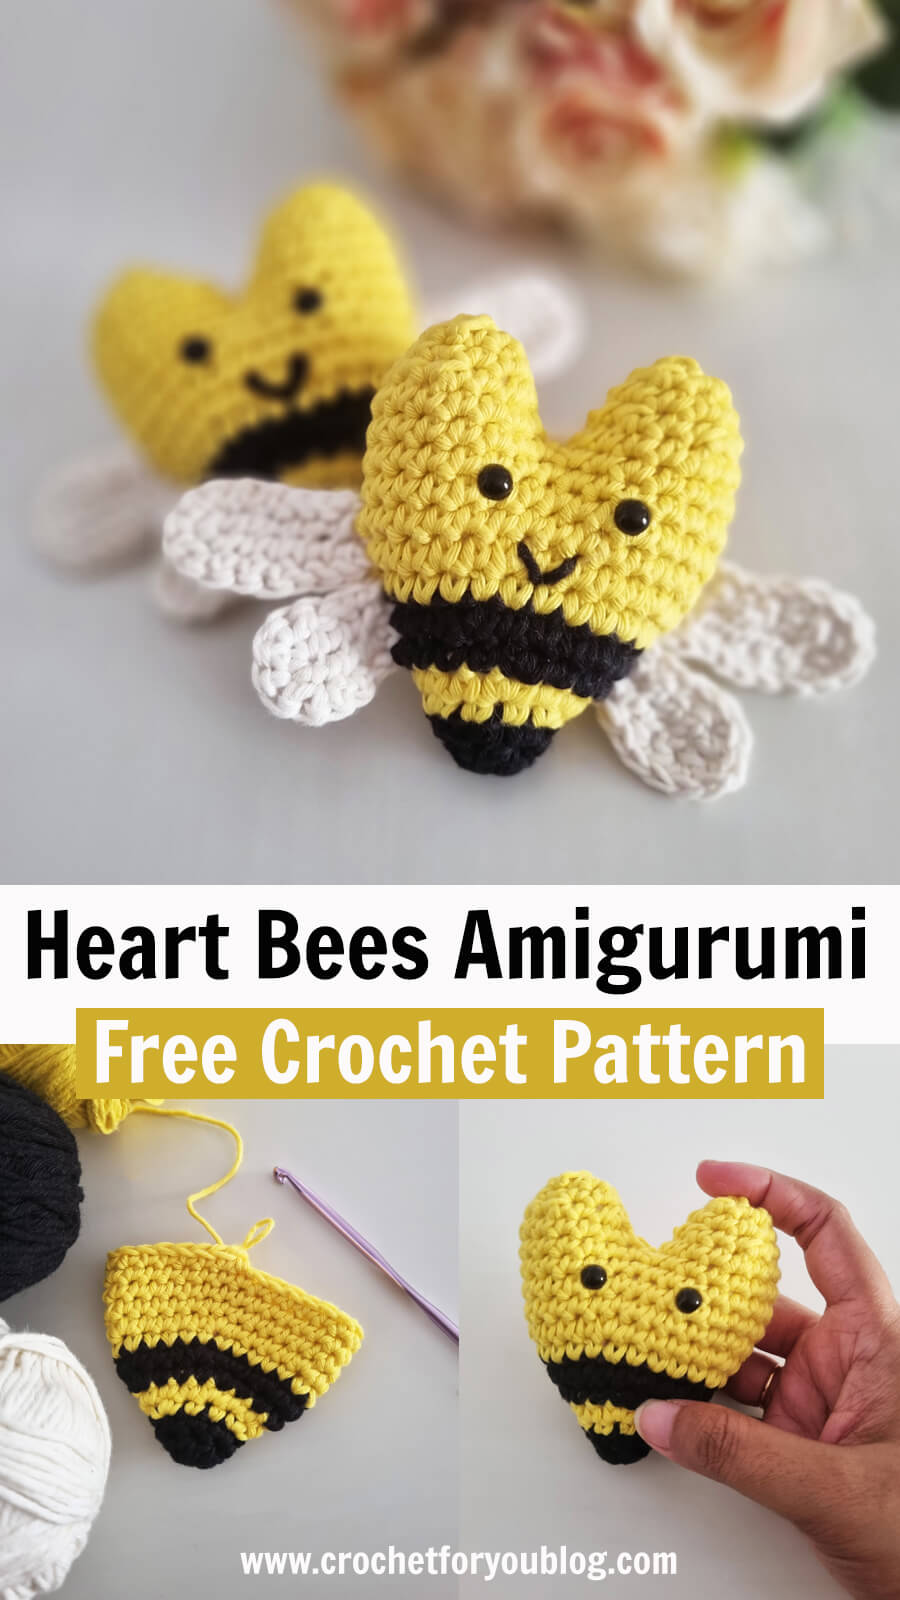
Crochet Heart Bees Amigurumi Free Pattern
Here is the fun little crochet project for Valentines Day. Aren’t this crochet heart bees amigurumi cute and fun to crochet? Give these little heart bees to your loved ones and show your love. If they are bee lovers like me they will more happy to have one of these.
Add this pattern to Ravelry queue
Save on Pinterest
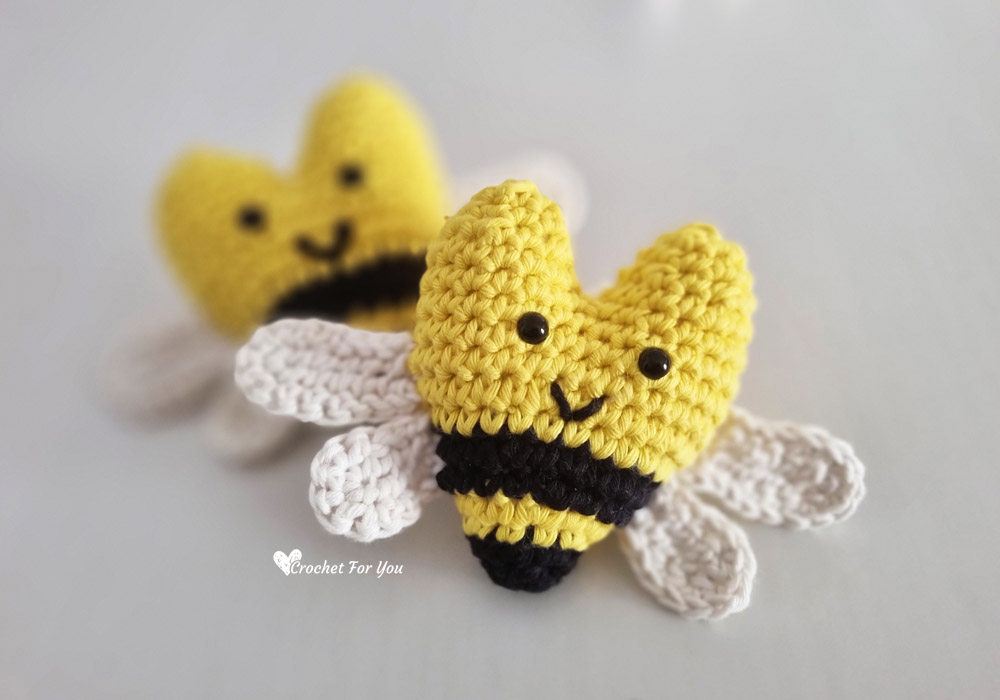
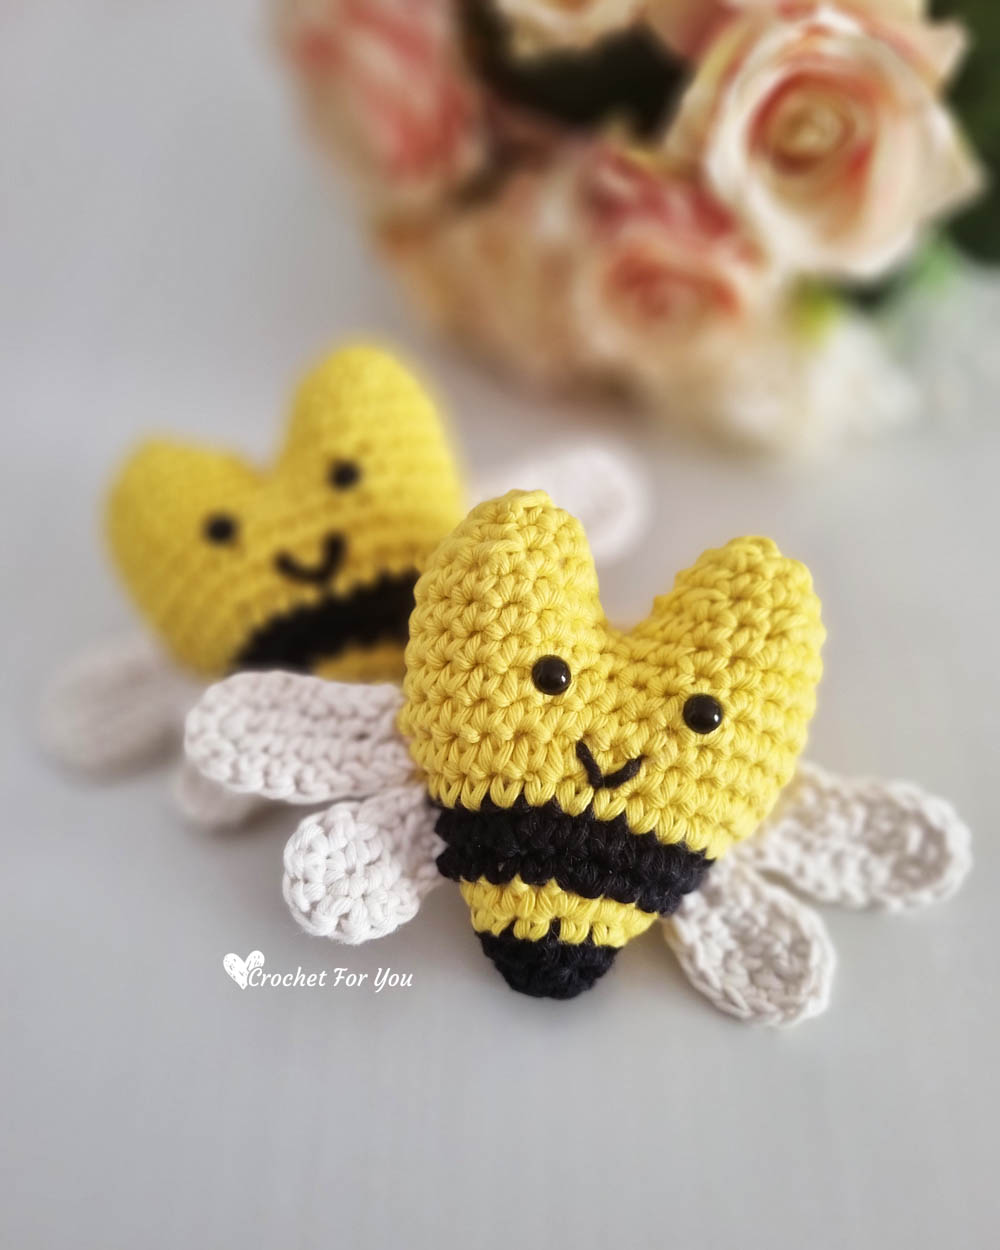
This is amigurumi style crochet project you can use many ways. Since this pattern requires a small amount of each color, you can use your scrap yarns too. The body of the bee made in heart shape with black and yellow colors. Features with tiny wings and little eyes and embroider mouth. That’s all.
Skill level: Intermediate
Finished size: 6″ wide, 3.75″ tall after stuffing
Materials
– 4-Medium weight / Worsted, 100% Cotton yarns in 3 colors. Black (C1 20 yards), Yellow (C2 30 yards), White (C3 20 yards)
– (US) G-6, 4 mm crochet hook
– (US) 7, 4.5 mm crochet hook
– Safety eyes (7 mm)
– Tapestry needle
– Stitch markers
– Scissors
Abbreviations (US Term)
– ch = chain
– sl st = slip stitch
– sc = single crochet
– hdc = half double crochet
– sc2tog = single crochet 2 together
– sk = skip
– *to ; = repeat * to the instructions.
Special stitches
– sc2tog = single crochet 2 together
Gauge: 15 sc x 16 rows = 4″ with US 7 (4.5mm) crochet hook
Pattern Notes
– Beginning chain does not count as a stitch.
– Gauge is not very important for this pattern.
– Heart pattern begins from the bottom and work in rounds.
Crochet Heart Bees Amigurumi Pattern
With (US) 7, 4.5 mm crochet hook and (C1) yarn,
Make an adjustable ring,
Round 1: ch 1, 6 hdc into the ring, join with sl st in first st. (6 hdc)
Round 2: ch 1, 2 sc in first st, *sc in next st, 2 sc in next st; repeat * from around, join with sl st in first st. (9 sc)
Round 3: with (C2), ch 1, 2 sc in first st, *sc in each of next 2 st, 2 sc in next st; repeat * from around, join with sl st in first st. (12 sc)
Round 4: repeat round 3. (16 sc)
Round 5: with (C1), ch 1, 2 sc in first st, *sc in each of next 3 st, 2 sc in next st; repeat * from around, join with sl st in first st. (20 sc)
Round 6: repeat round 5. (25 sc)
Round 7: with (C2), ch 1, sc in each st around, join with sl st in first st. (25 sc)
Round 8: ch 1, 2 sc in first st, *sc in each of next 4 st, 2 sc in next st; repeat * from around, join with sl st in first st. (30 sc)
Round 9 to 11: ch 1, sc in each st around, join with sl st in first st. (30 sc) Start adding fiberfill as you go.
Top of the Heart
Round 12: ch 1, sc in each of 15 st, join with sl st in first st. (15 sc)
Round 13: repeat round 12. (15 sc)
Round 14: ch 1, sc in first st, *sc2tog, sc in next st; repeat * from around, join with sl st in first st. (10 sc)
Round 15: ch 1, sc in each st around, join with sl st in first st. (10 sc)
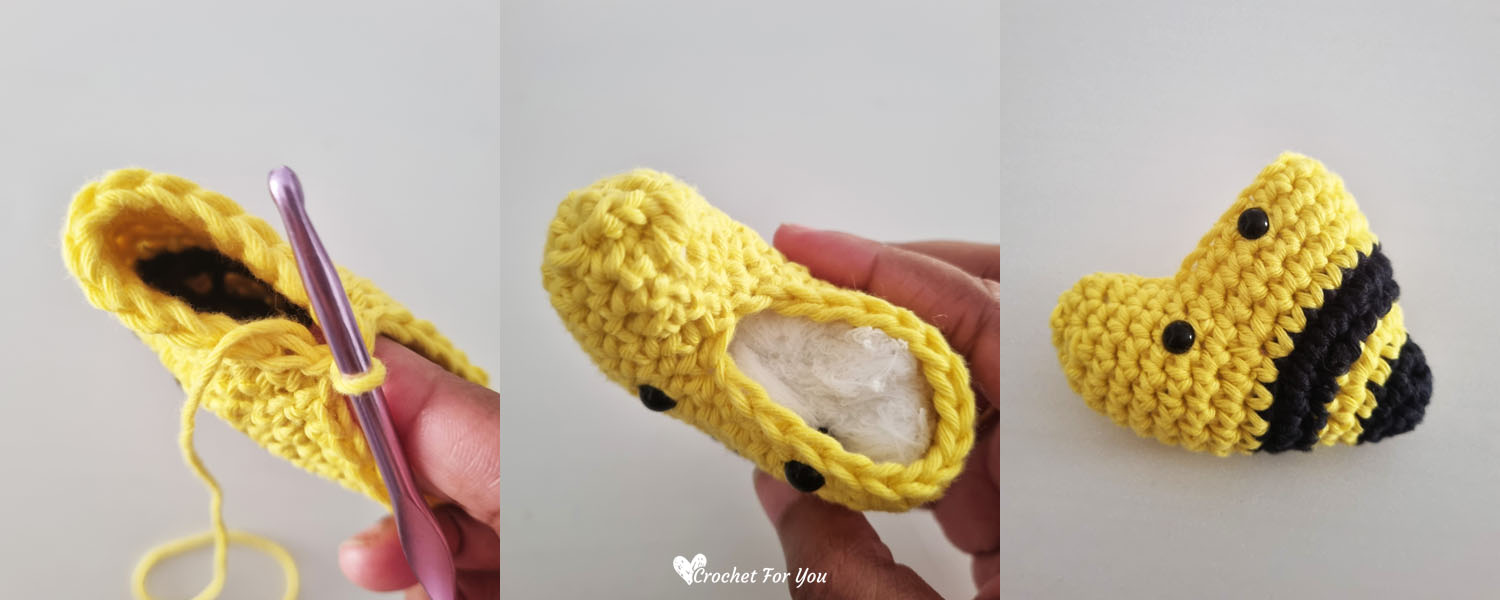
Round 16: ch 1, sc in first st, *sc2tog, sc in next st; repeat * from around, join with sl st in first st. (7 sc) Add more fiberfill and stuff firmly to get the heart shape.
Fasten off and cut the yarn leaving about 10” long yarn tail. Insert the yarn tail through the tapestry needle and weave in and out through the stitches around the last round, pull the yarn tightly and close the top with a few more stitches.
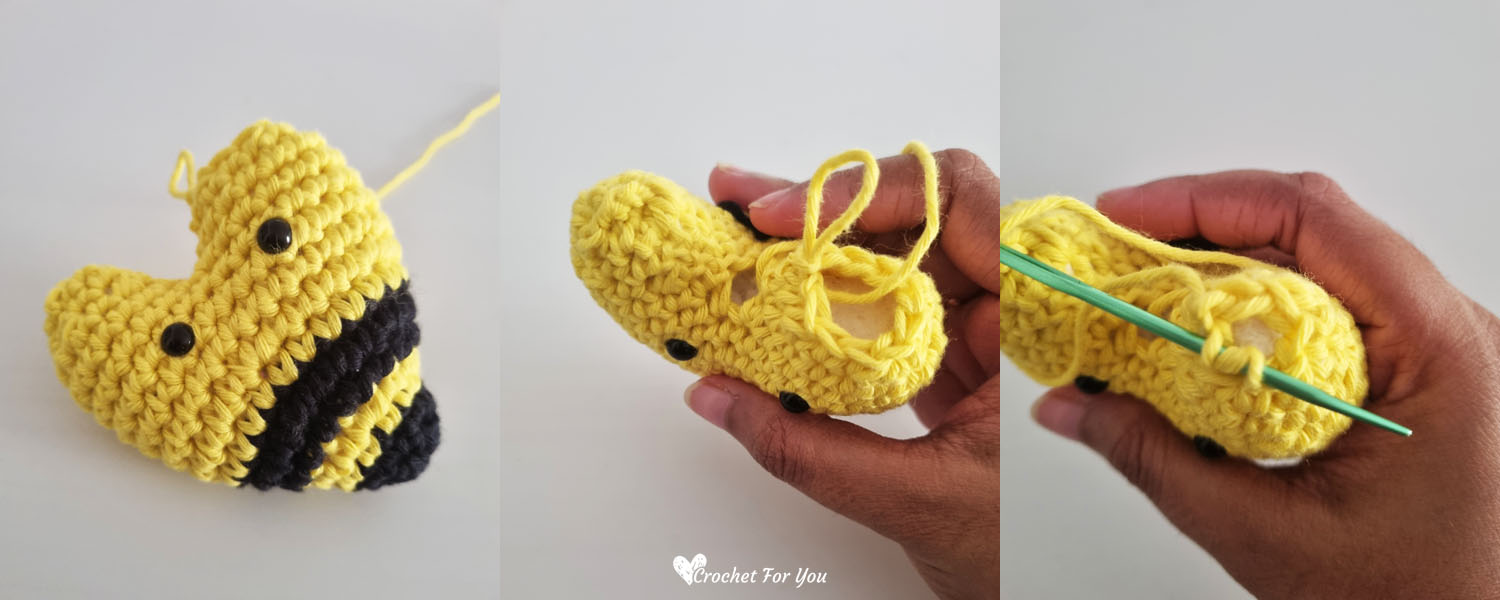
Attaching eyes
Insert safety eyes between 10 and 11 rounds. About 5 stitches apart
I attached 1st eye between 11th & 12th stitches, 2nd eye between 16th & 17th stitches of round 10 and 11.
Ensure the eyes in the right spot as you crochet tops of the heart. If you think eyes are in a different spot and not centered change the spot and adjust the eyes.
Other side of the heart top
Join the (C2) yarn one of the skipped st.
Round 12: ch 1, sc in each of 15 st, join with sl st in first st. (15 sc)
Round 13: repeat round 12. (15 sc)
Round 14: ch 1, sc in first st, *sc2tog, sc in next st; repeat * from around, join with sl st in first st. (10 sc)
Round 15: ch 1, sc in each st around, join with sl st in first st. (10 sc)
Round 16: ch 1, sc in first st, *sc2tog, sc in next st; repeat * from around, join with sl st in first st. (7 sc) Add more fiberfill.
Fasten off and cut the yarn leaving about 10” long yarn tail. Insert the yarn tail through the tapestry needle and weave in and out through the stitches around the last round, pull the yarn tightly and close the top with few more stitches.
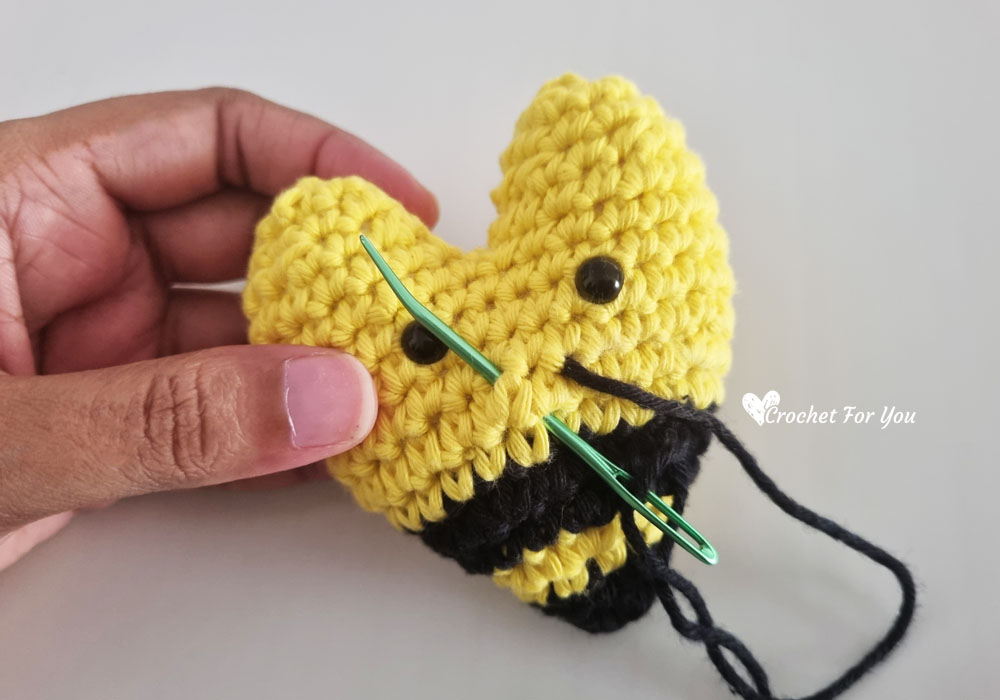
There is a little hole left between two heart tops. You can use it to add more fiberfill to make the shape of the heart. Finally, make few stitches using yarn tails of the heart top to close the hole.
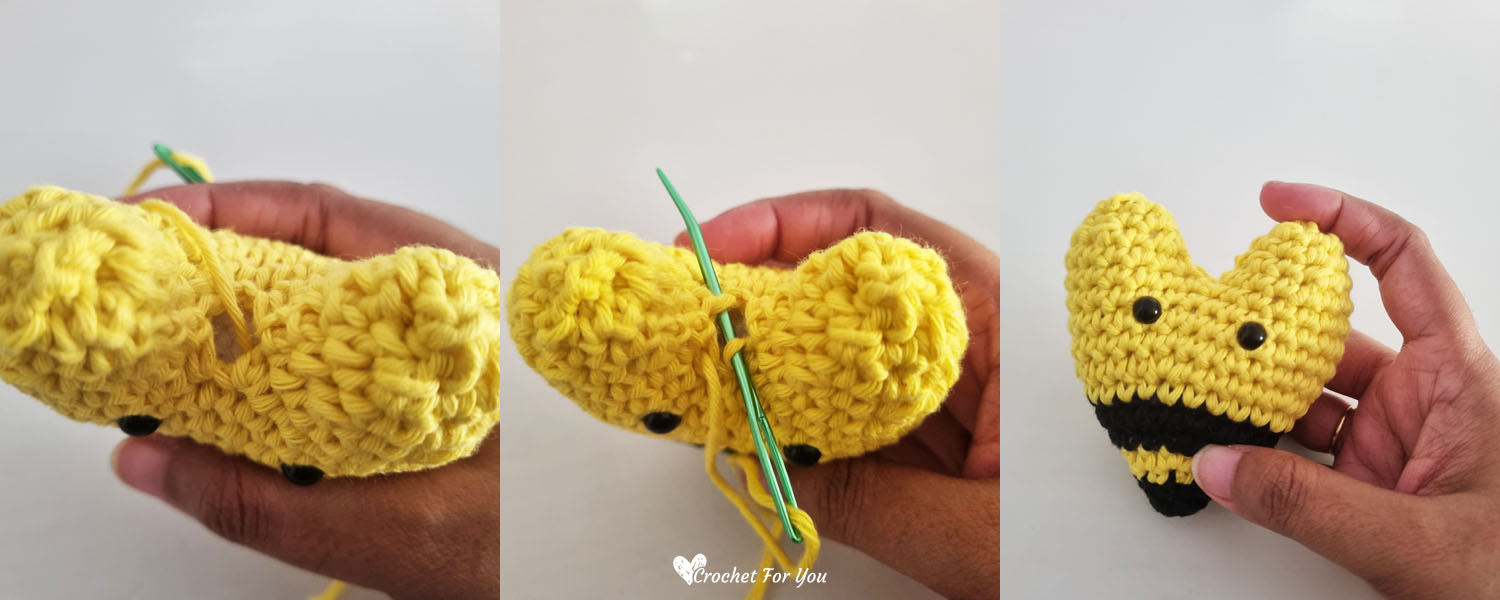
Mouth
Embroider triangular mouth with black color yarn.
Small wing (make 2)
With (US) G-6, 4 mm crochet hook and (C3) yarn, Ch 5.
Row 1: sc in 2nd ch from the hook, sc in each of next ch 2, 3 sc in last ch, working on the opposite side of the foundation chains, sc in each of next ch 3, turn. (9 sc)
Row 2: slip st in first st and next st, sc in next st, 2 sc in each of next 3 st, sc in next st, slip st in each of next 2 st. (4 slip st/8 sc)
Fasten off and cut the yarn leaving about 10” long yarn tail.
Large wing (make 2)
With (US) G-6, 4 mm crochet hook and (C3) yarn, Ch 7.
Row 1: sc in 2nd ch from the hook, sc in each of next ch 4, 3 sc in last ch, working on the opposite side of the foundation chains, sc in each of next ch 5, turn. (13 sc)
Row 2: slip st in first st and each of next 2 st, sc in each of next 2 st, 2 sc in each of next 3 st, sc in each of next 2 st, slip st in each of next 3 st. (6 slip st/10 sc)
Fasten off and cut the yarn leaving about 10” long yarn tail.
Attaching wings
Sew each small and large wing on 2 sides of the heart using yarn tails. (see the photo below)


Hope to see you soon with a new FREE pattern
Until then, Happy Crocheting!!
Share your finished projects of this pattern on Crochet For You FB page.
Happy hooking with Crochet For You!!
Let’s connect and share
Facebook | Pinterest | Youtube | Instagram
All contents include photography and patterns are copyrighted Crochet For You by Erangi Udeshika.
Do not copy, edit, distribute or republish patterns and images in this blog in part or whole as your own. Please, share a direct link to the pattern with others and anywhere else. You are welcome to make and sell finished items using my patterns.
Visit Copyright / Terms of use for more info.
Thank you.


One Comment
Mar
Thank you for sharing. I can’t wait to start my ideas are going craze for the kids. Again thank you, Mar.