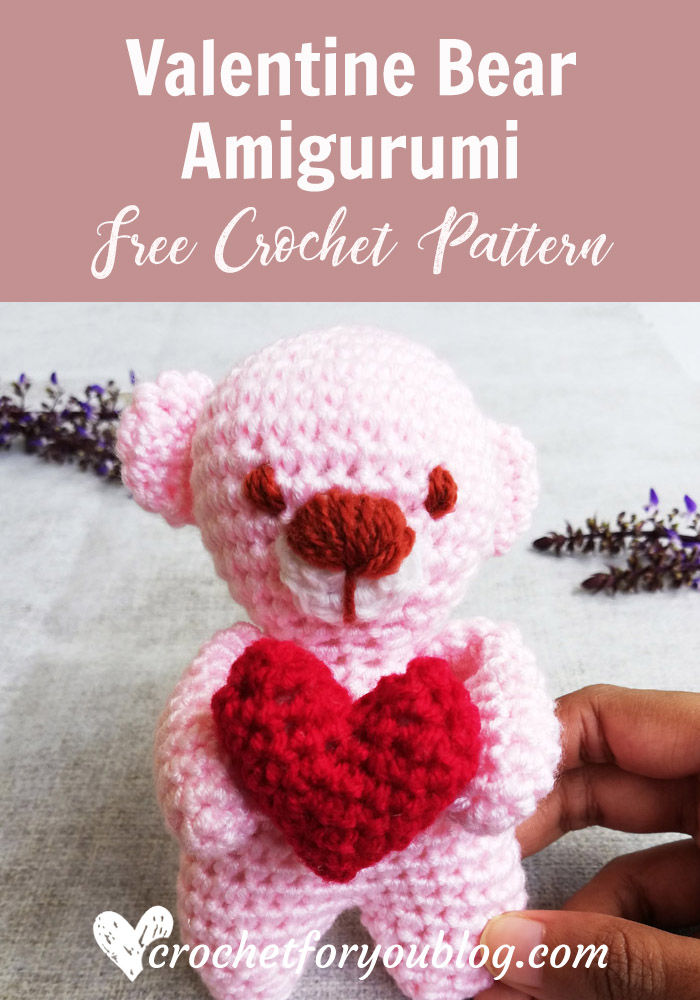
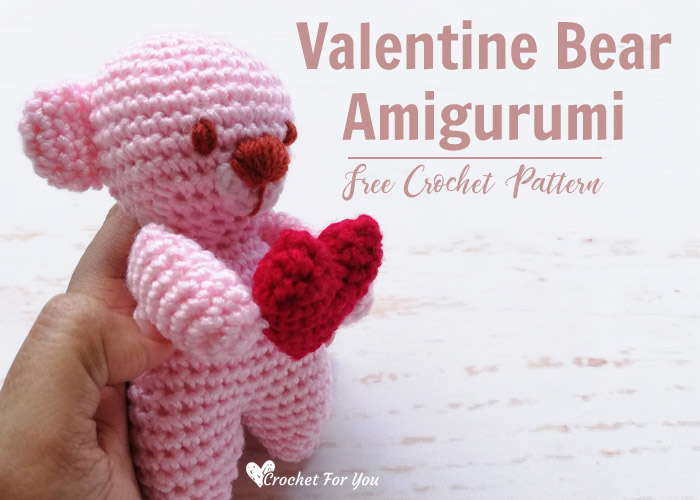
Valentine Bear Free Crochet Pattern
Valentine Bear Crochet Pattern by Crochet For You.
Here is a last minute gift for valentines day.
This Valentine bear is very special to me, too. It is the first perfect amigurumi pattern I made. I have a little experience crocheting amigurumi. The Heart Angel I shared last week want me to make more amigurumi patterns.
I have shared lots of ragdoll style crochet amigurumi patterns.
They are simple shaped, stuffed flat and two-dimensional softies. You can check out my Spring Chick and the Christmas Ornaments I made for last 2 CAL’s.
This year, my plan is to give try to make more amigurumi patterns, of course, I’ll share them with you too (if they turned out well). 😉
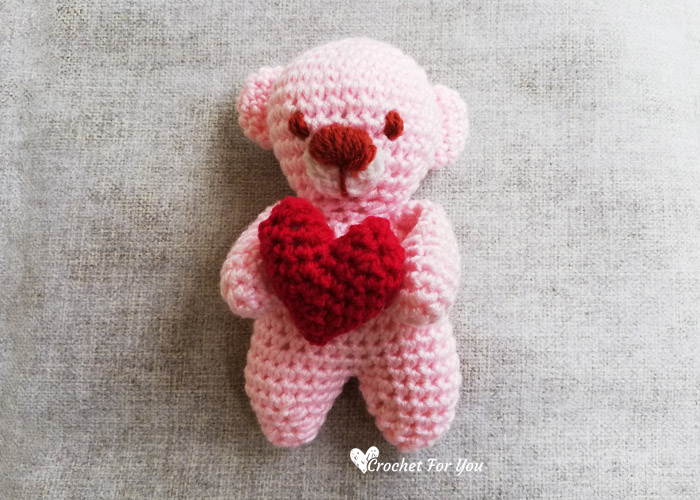
I hope you love this cute little Valentine Bear. If you haven’t tried yet to crochet amigurumi, but you really want, I have included lots of step by step photos for this pattern.
Disclosure This blog may contain affiliate links.
Add this pattern to Ravelry queue
Save on Pinterest
More Valentine’s Day Crochet Pattern to Try
– Heart Angel
– Puff Hearts Beanie
– Heart Potholder
Skill Level: Intermediate
Finished sizes: about 5.5″ tall
Materials
- Sport or DK weight yarn in pink color yarn (approx: 60 yards)
Small amount of white and brown color yarn. (sport or DK weight approx: 10 yards from each)- Sport or DK weight yarn in white color yarn (approx: 30 yards)
- US E-4, 3.5mm crochet hook
- Tapestry needle for weaving ends.
Fiberfil
Gauge: Gauge is not very important for this project.
Abbreviations (US Term)
- ch = chain
- sl st = slip stitch
- sc = single crochet
- hdc = half double crochet
- st = stitch
- sk = skip
- beg = beginning
- * to ; = repeat * to the instructions.
- sc dec = crochet 2 sc together (Insert the hook and draw up a loop in each of 2 stitches, yarn over, pull back through all 3 loops on hook at once)
- sc inc = crochet 2 sc in same st.
Notes:
- Beg ch does not count as a stitch.
- Each round start in the first stitch.
Valentine Bear Crochet Pattern
Head
Make an adjustable/magic ring.
Round 1: ch 1, 6 sc into the adjustable ring, sl st to the first st. (6 sts)
Round 2: ch 1, 2 sc in each st around,
Round 3: ch 1,[sc inc, 1 sc] 6 times,
Round 4: ch 1, [sc inc, sc in each of next 2 sts] 6 times,
Round 5: ch 1, [sc inc, sc in each of next 3 sts] 6 times,
Round 6: ch 1, [sc inc, sc in each of next 4 sts] 6 times,
Round 7: ch 1, sc in each st around,
Round 8 to 11: repeat round 7.
Round 12: ch 1, [sc dec, sc in each of next 4 sts] 6 times,
Round 13: ch 1, [sc dec, sc in each of next 3 sts] 6 times,
Round 14: ch 1, [sc dec, sc in each of next 2 sts] 6 times,
Round 15: ch 1, [sc dec, sc in next st] 6 times,
Body
Round 16: ch 1, sc in each st around,
Round 17: ch 1, [sc inc, 1 sc] 6 times, sl st to the first st. (18 sts)
Round 18: ch 1, [sc inc, sc in each of next 2 sts] 6 times,
Round 19: ch 1, sc in each st around,
Round 20: ch 1, sc in each st around,
Round 21: ch 1, [sc inc, sc in each of next 3 sts] 6 times,
Round 22: ch 1, sc in each st around,
Round 23 to 25: ch 1, repeat round 22.
Round 26: ch 1, [sc inc, sc in each of next 4 sts] 6 times,
Legs
Round 27: ch 1, sc in 18 sts, skip all the sts next,
Round 28: ch 1, sc in each st around,
Round 29: ch 1, [sc dec, sc in each of next 4 sts] 3 times,
Round 30: ch 1, [sc dec, sc in each of next 3 sts] 3 times,
Round 31: ch 1, [sc dec, sc in each of next 2 sts] 3 times,
Round 32: ch 1, [sc dec, 1 sc] 3 times,
Fasten off and cut the yarn leaving about 8″ long yarn tail.
Next leg
Start from the first st of skipped sts. Join the yarn, repeat rounds 27 to 32. Fasten off and cut the yarn leaving about 8″ long yarn tail.
Arms (make 2)
Make an adjustable/magic ring.
Round 1: ch 1, 6 sc into the adjustable ring,
Round 2: ch 1, 2 sc in each st around,
Round 3: ch 1, [sc inc, 1 sc] 6 times,
Round 4: ch 1, sc in each st around,
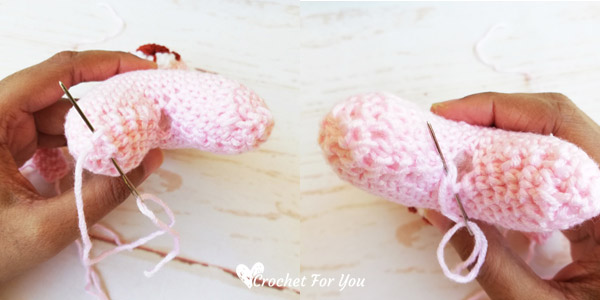
Round 5 to 11: repeat round 4. Add fiberfill lightly. Stuff only half way.
Round 12: ch 1, start from the first st, sc dec around,
Fasten off and cut the yarn leaving about 8″ long yarn tail.
Ears (make 2)
Make an adjustable/magic ring.
Round 1: ch 1, 6 sc into the adjustable ring, sl st to the first st. (6 sts)
Round 2: ch 1, 2 sc in each st around,
Round 3: ch 1, [sc inc, 1 sc] 6 times,
Round 4: repeat round 3.
Fasten off and cut the yarn leaving about 8″ long yarn tail.
Nose
Make an adjustable/magic ring with white yarn.
Round 1: ch 1, 6 sc into the adjustable ring,
Round 2: ch 1, 2 sc in each st around,
Fasten off and cut the yarn leaving about 8″ long yarn tail.
Finishing
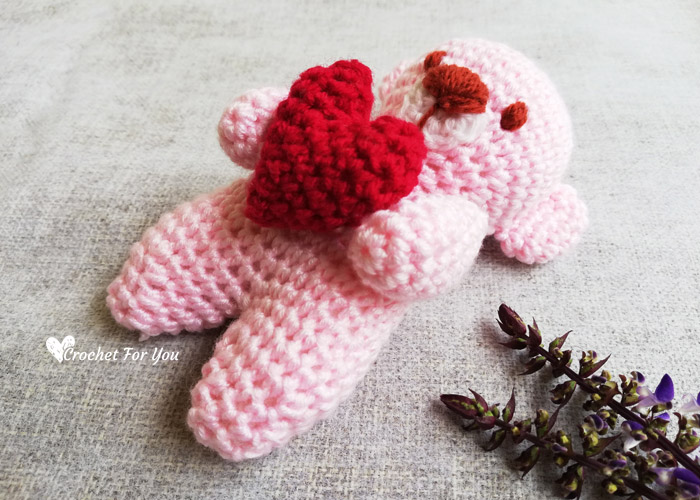
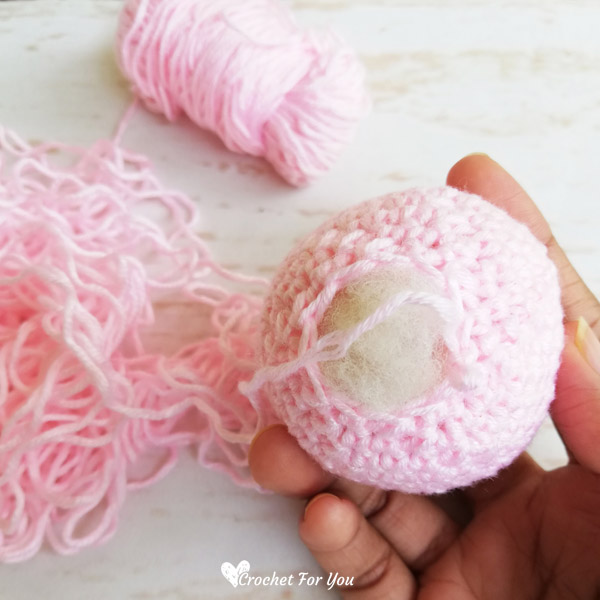
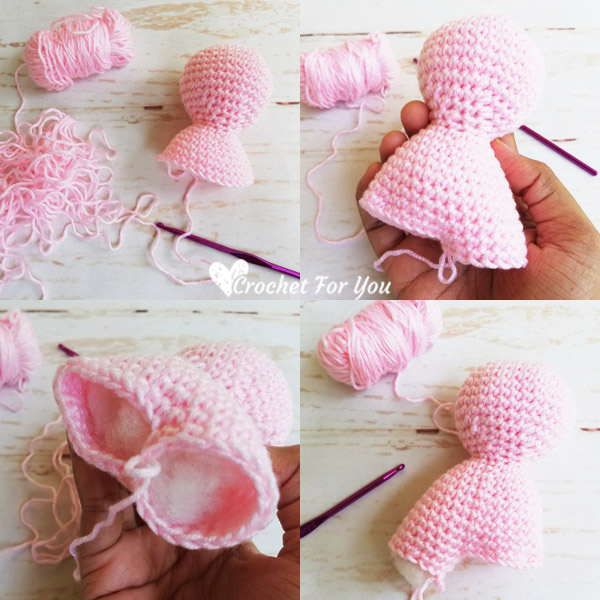
Make a few stitches using yarn tails of the leg bottom to close the hole. And sew the little hole in the middle. (You can use it to add more fiberfill if want)
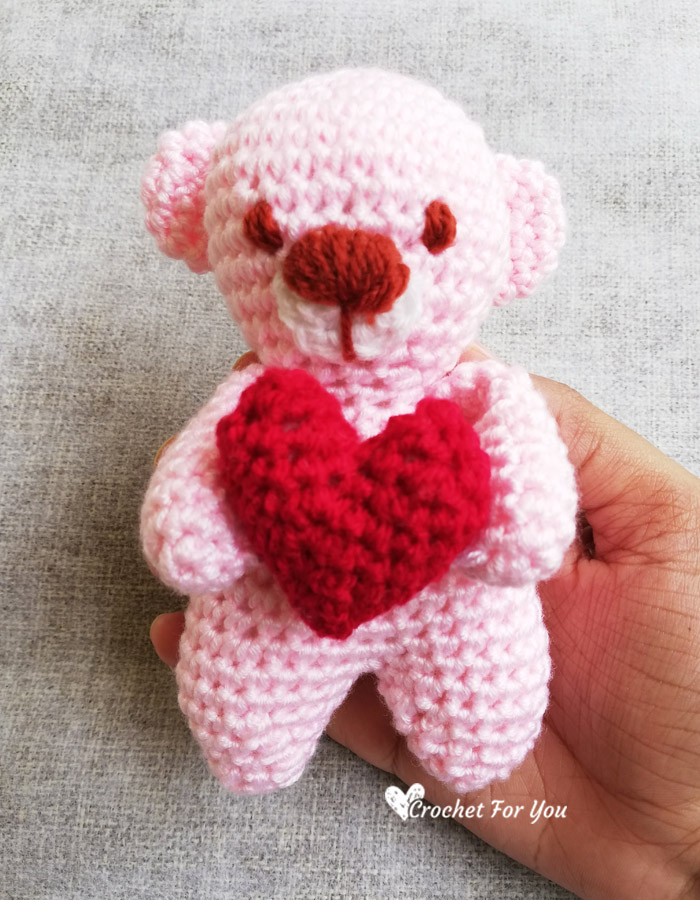
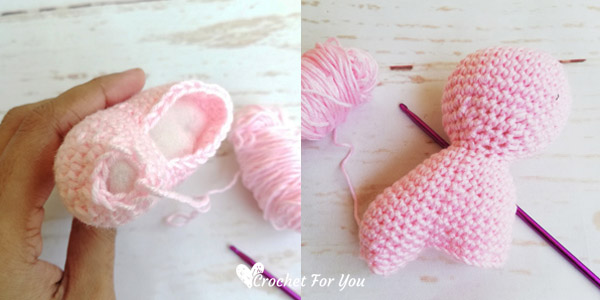
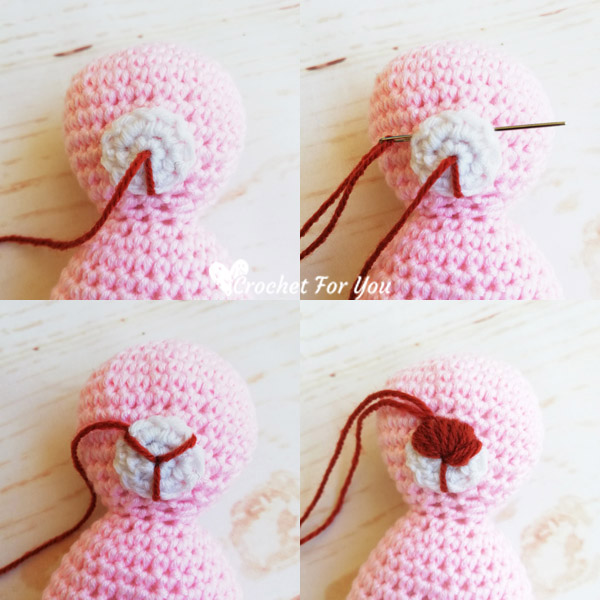
Sew snout between 11 and 15 rounds with the tapestry needle and yarn tail. With brown color yarn and the tapestry needle, embroider muzzle. (see step by step photos below)
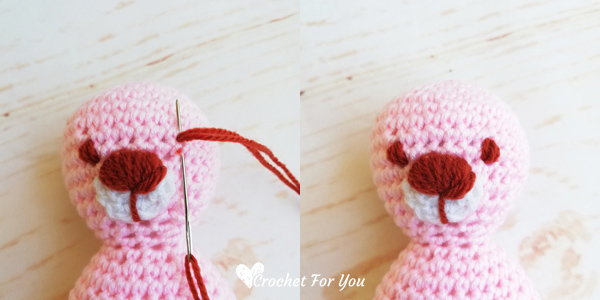
Embroider short straight lines above the snout for eyes.
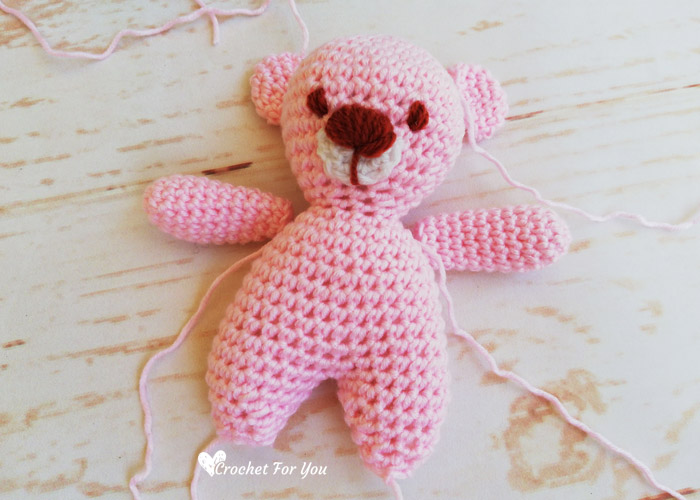
Sew each ear on 2 sides on the head between 5 and 10 rounds using yarn tails.
Sew arms at round 16 of the body. (see the photo below)
Crochet Heart
Click here to go to the Crochet Heart Angle Pattern page, and follow the Heart pattern only. Attach the heart to the arms.

Hope to see you soon with a new FREE pattern
Until then, Happy Crocheting!!
Share your finished projects of this pattern on Crochet For You FB page.
Happy hooking with Crochet For You!!
Let’s connect and share
Facebook | Pinterest | Youtube | Instagram
All contents include photography and patterns are copyrighted Crochet For You by Erangi Udeshika.
Do not copy, edit, distribute or republish patterns and images in this blog in part or whole as your own. Please, share a direct link to the pattern with others and anywhere else. You are welcome to make and sell finished items using my patterns.
Visit Copyright / Terms of use for more info.
Thank you.


4 Comments
Mirja
I fell in love with this little one and tried to chroset it but unfortunately I did not quit understand the pattern. After makeing the head there come the legs How to make the body ?
Erangi Udeshika
Ohh.. Thank you so much Mirja for letting me know about this. It was a huge mistake. I just fixed and updated the pattern. I’m so sorry. Hope you will continue the pattern from where you stopped. Thank you again!
Laura
Your patterns will not print. There are several overlaps and it all comes out gibberish.
Sheltie Times
I’m a huge fan of patterns that connect the head to the body and then the legs so I don’t have to sew them on. Sometimes I even adapt them to avoid sewing so I really love the ones that do it for me. An adorable bear.