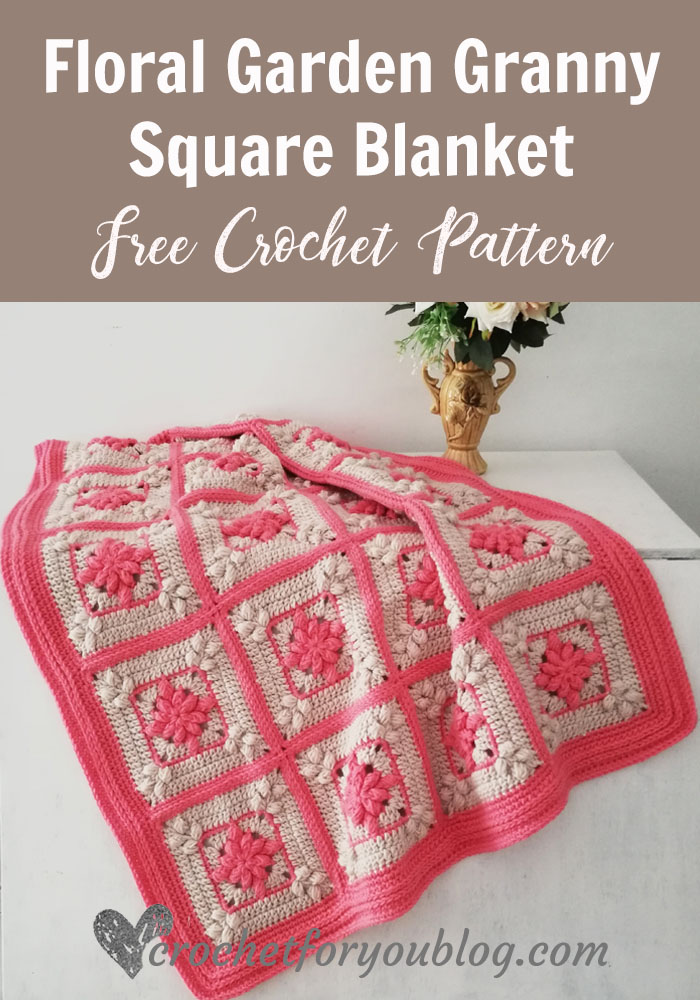
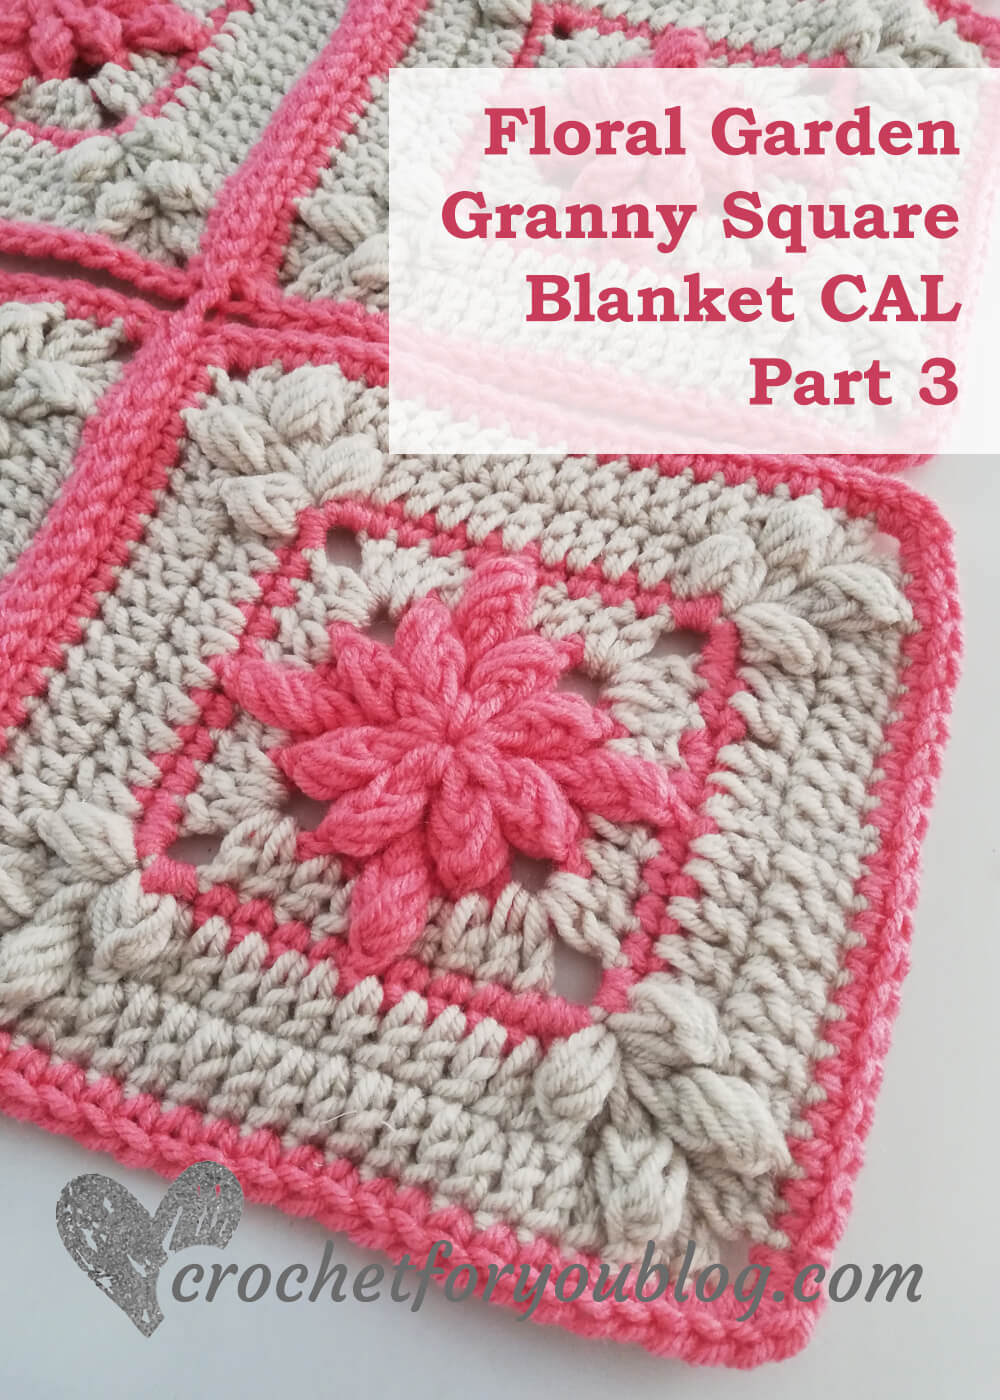
Floral Garden Granny Square Blanket CAL -Part 3
If you love a textured, floral blanket with fun and relaxing squares, you’ll love this Floral Garden Granny Square Blanket CAL.
- Click here for the main post to see how it works, the materials you’ll need and how to customize the pattern size
- Like, Follow Crochet For You on Facebook and Instagram.
- Tag #crochetforyoublog when you share your WIP or finished project on Social media
- Sign up for the newsletter for new updates on the blog
Disclosure This blog contain affiliate links.
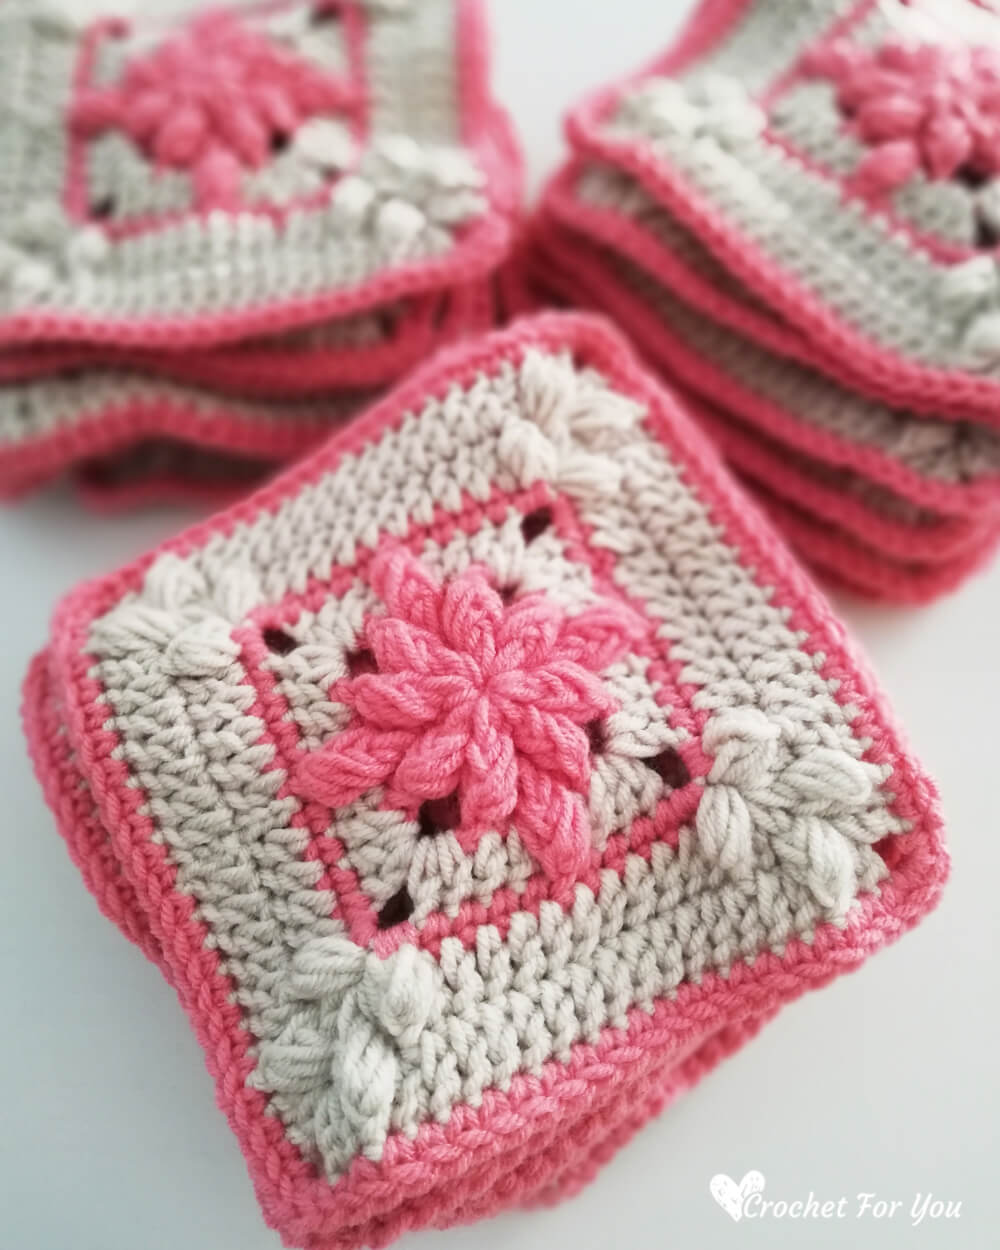
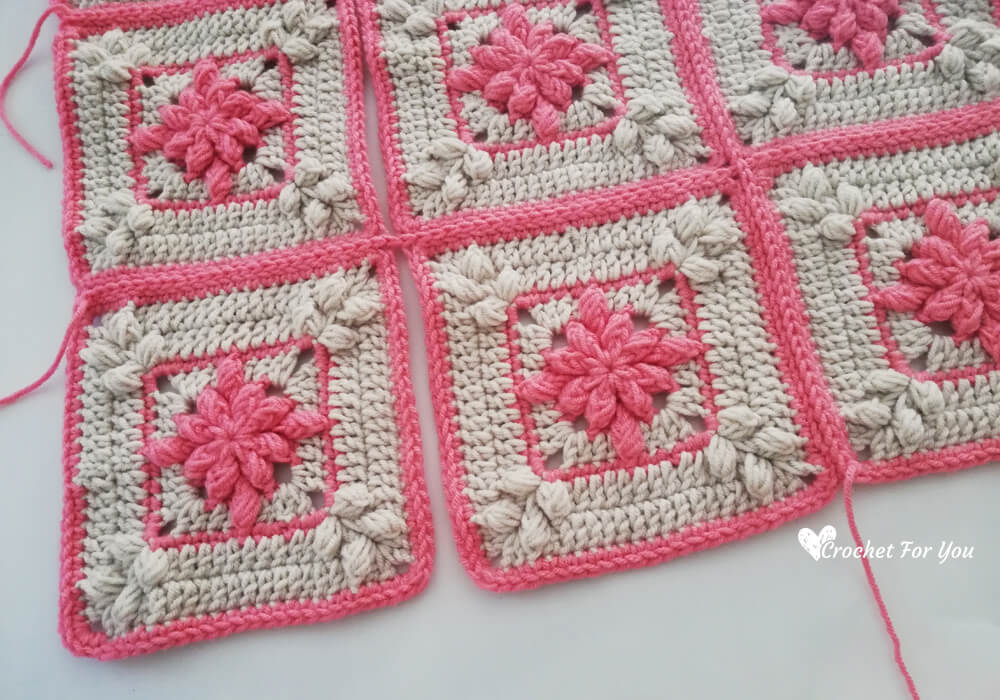
Before starting this week’s part, I would like to know your idea about the CAL. Did the last 2 parts were easy? Did you enjoy the square pattern? In part 1 and part 2 we made Floral Garden Squares 7” x 7” in size which feature Bobble Drops Stitch.

Add this pattern to Ravelry queue
Save on Pinterest
It’s time for joining..
In this part we are going to join all the squares. If you have joined and started the CAL, now you may probably have a bunch of crochet squares for joining.
But first! Blocking is the best!
Whether your squares look nice and lay without shrinking, blocking gives a well-finished look to all the crochet projects so the crochet squares, too.
The floral garden square is flat and no curls so I think there’s no need serious blocking method like wet block or steam blocking. I just need to get rid of rounded corners to get the extra perfect look with straight edges to easier to join.
I used a simple Blocking Station method Dedri used on Look At What I Made. With a Styrofoam board and some sticks found around the home, I made my own blocking station like Sarah did in this tutorial on Repeat Crafter Me.
If you think your square needs a wet block or steam blocking, there is a great tutorial that explains how to wet or steam blocking crochet squares on Heart Hook Home.
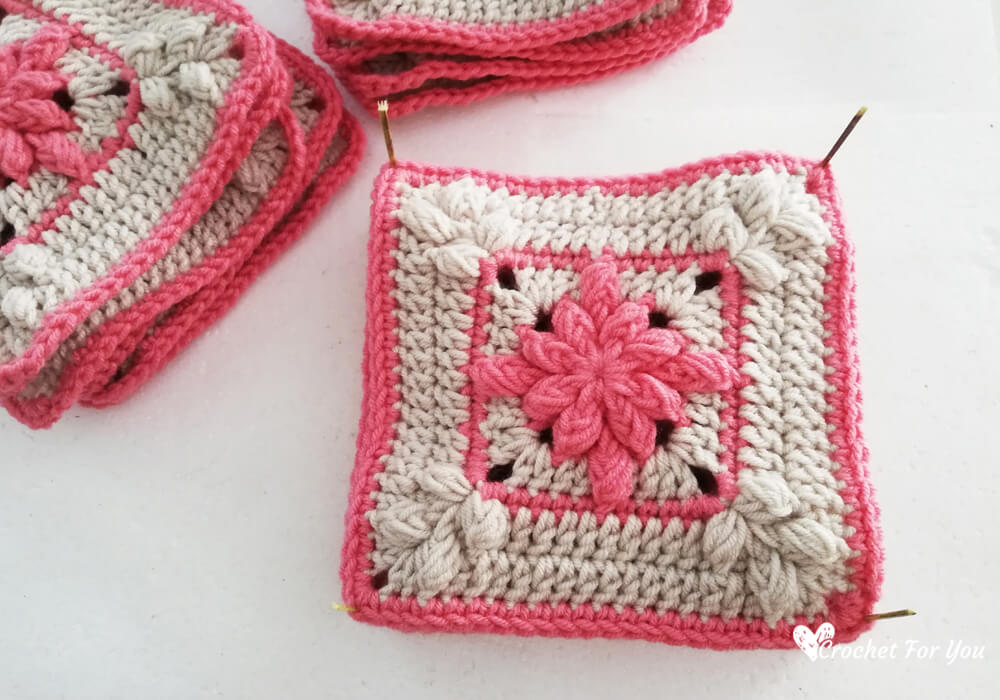
So I made my own blocking station, marked 7” x 7” square on the styrofoam and inserted the sticks straightly on each marked corner. You can add more sticks between two corner sticks.
Place the square one by one until there are 6 or 8. Do not forget to spray some water on each square before adding the next square. Keep them to relax and settle overnight, when all the blocks get dry remove the sticks. Now your squares are ready to join!
Let’s begin!
Floral Garden Granny Square Blanket CAL -Part 3
There are many ways to join crochet squares. You can sew the squares together or use single crochet seam, Click here to see the great tutorial with 14 methods for joining crochet squares on Moogly. To make Floral Garden Granny Square Blanket I used a flat zipper method. This is my first time using this method to join squares and I really loved it.
The flat zipper method needs a little practicing, but when you grab the rhythm it’s fun to work. I love the flat seam it doesn’t look two pieces join at all.
I learned this amazing joining method from this tutorial on Look At What I Made
Below you will find how using this method to make Floral Garden Granny Square Blanket with lots of step by step photos and there is a video tutorial you can watch.
Gather your Floral Gargern Granny Squares and materials.
You will need
– Ice Yarn Saver – Candy Pink (C1), the same color yarn you used for single crochet border of each square in part 2.
– US 1-9 (5.5mm) crochet hook
– Tapestry needle for weaving ends
Abbreviations / special stitches (US term)
- ch = chain
- sl st = slip stitch
- sc = single crochet
- st = stitch
- ch-sp = chain- (number of chains) space
- beg = beginning
- *to ; = repeat * to the instructions.
- C1 = color 1 Candy Pink
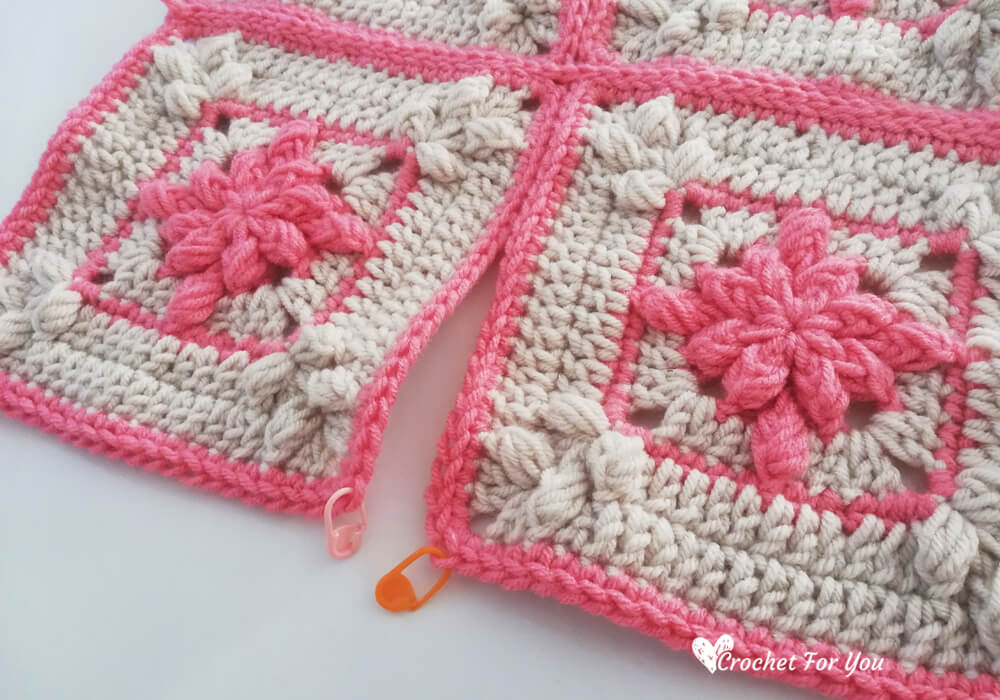
I made 20 squares for a baby blanket and arranged 4 rows by 5 squares. You can arrange your squares before starting joining.
To begin the joining, get the 2 squares first and add stitch markers in the middle st of each corner st.
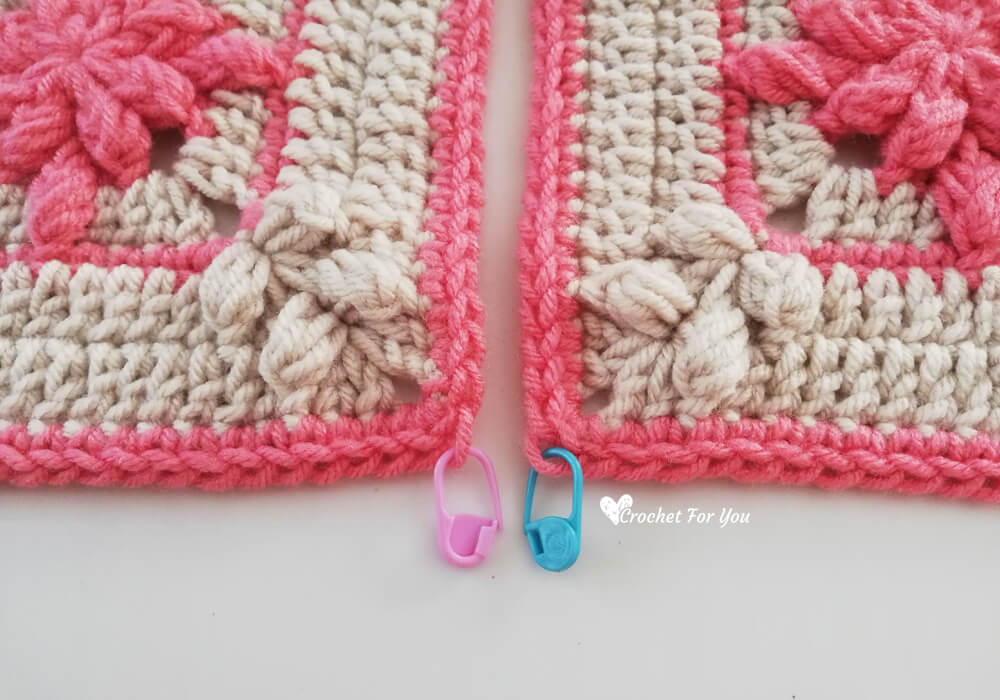
Lay the 2 squares side by side (Facing right side up). Now we are going to join these two squares.
If you are a right handed crocheter, start from the right side square, if you are left handed start from the left side square.
Notes:
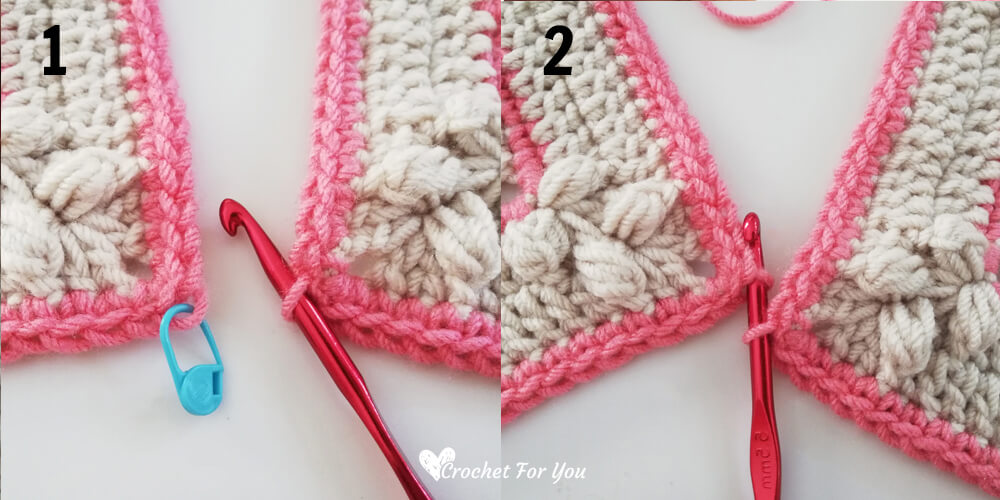
- Working only in the back loop of each square.
- And always insert the hook from front to back.
- Keep the working yarn under the crochet piece for easy grabbing.
- Keep in mind to always crochet loosely, not tightly.
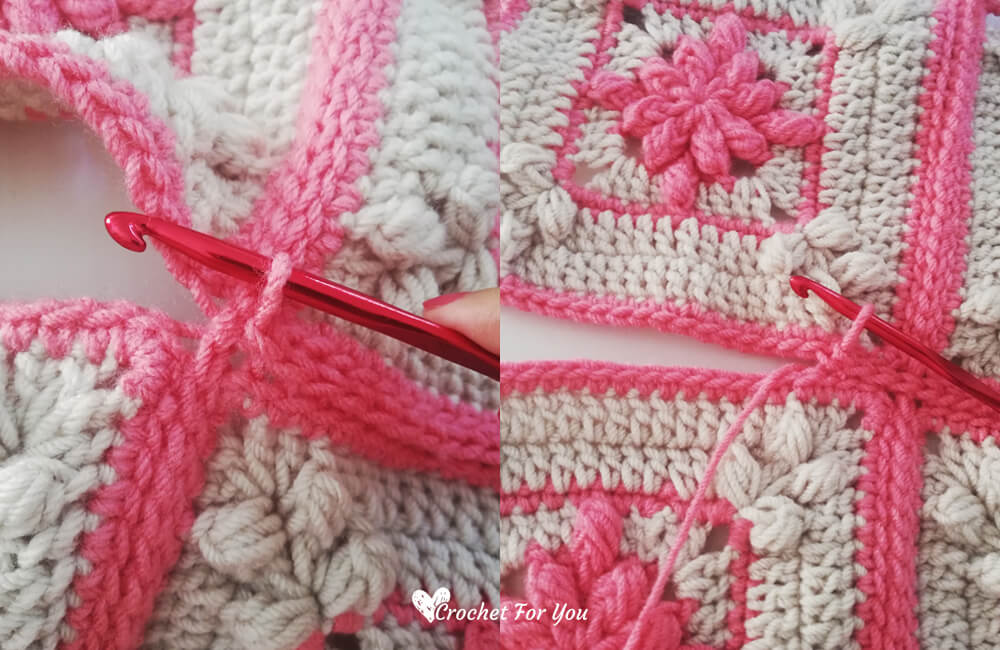
Step 1: Insert the hook into the back loop of a marked st from front to back (first square). (Image 1)
Step 2: Insert the hook into the back loop of a marked st from front to back of the next square (second square). (Image 2)
Step 3: Now grab the yarn you are going to use for joining, make a slip knot and insert the hook through it (Image 3). Pull back through the both loops on the hook. (Image 4)
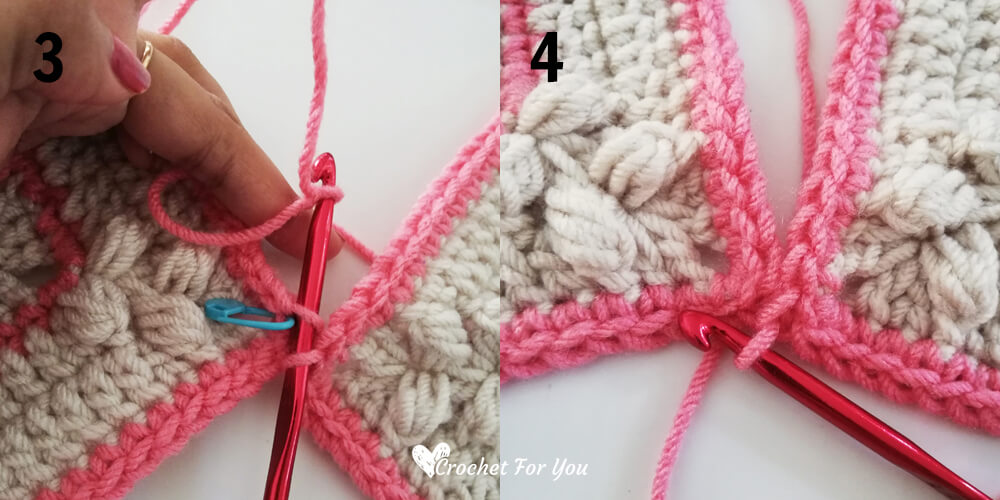
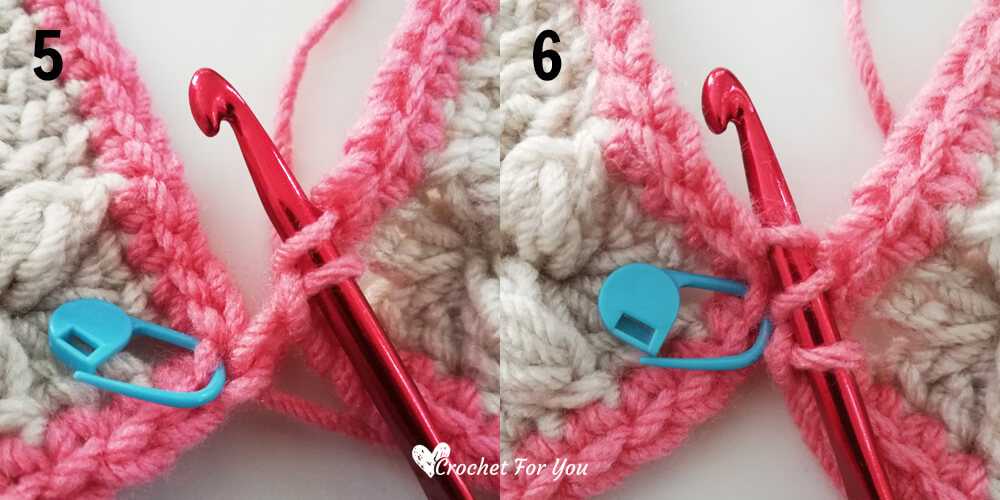
Step 4: Insert the hook into the back loop of the next st from front to back (first square) (Image 5). Then insert the hook into the back loop of the next st from front to back of the next square (second square) (Image 6).
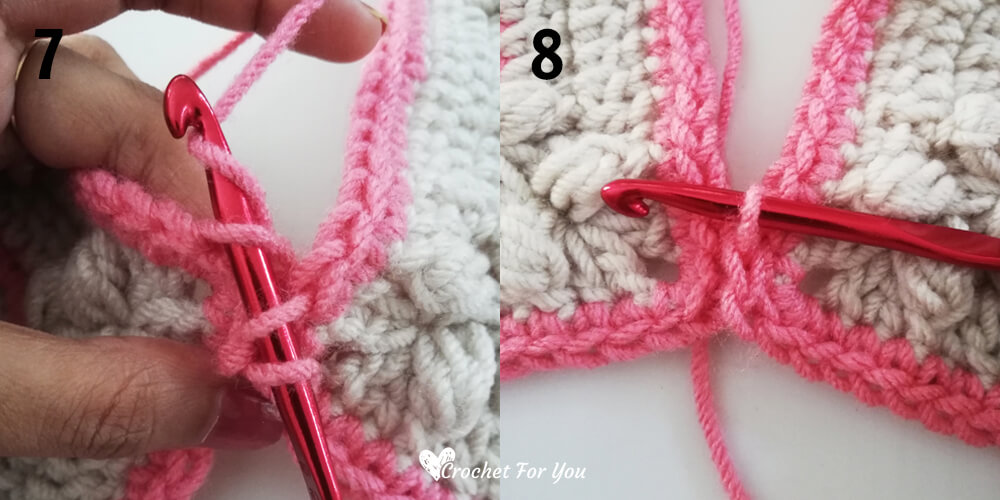
Step 5: yarn over (Image 7), pull back through the two loops on the hook (Image 8).
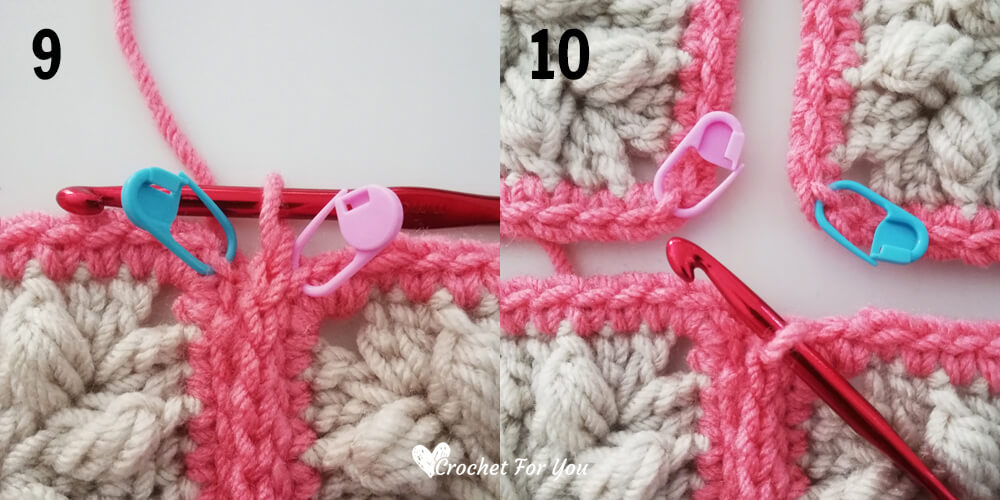
Repeat these steps until the last corner stitch (marked stitch) of the both squares. Keep in mind to always crochet loosely, not tightly.
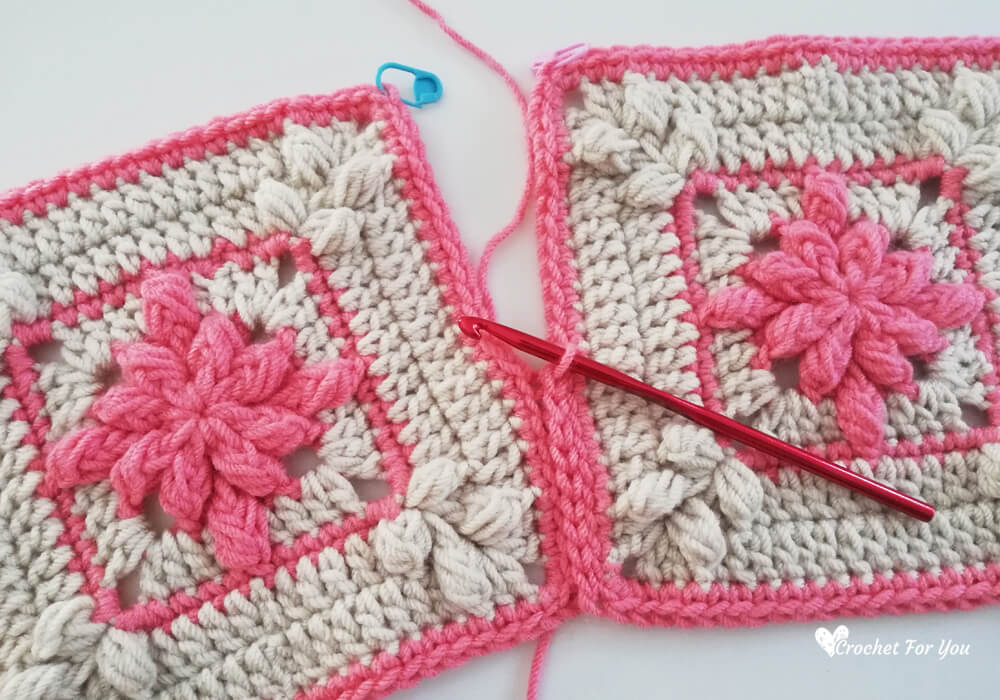
When you reach the last corner stitch of the both squares (Image 9) do not cut the yarn, ready to join the next two squares (Image 10).
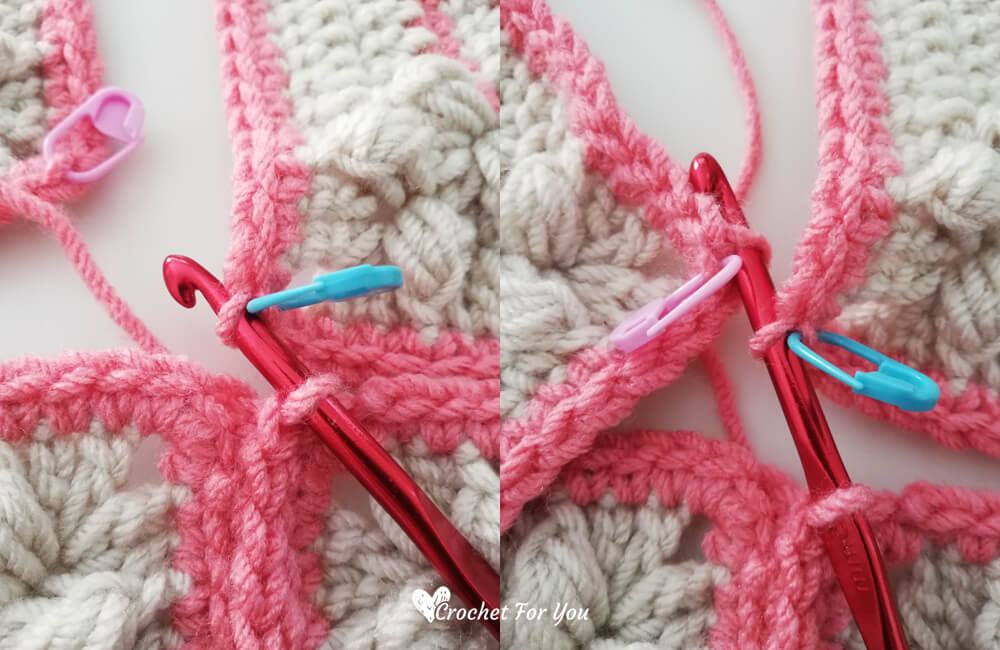
Now we are going to join two more squares to the crochet pieces we just finish joining.
Lay another two squares with marked stitches as we did and repeat steps 1 to 5 again until the last stitches of the both squares. You can repeat these steps and join any number of squares as you want.
Since I made a baby blanket with 20 squares, I joined 10 squares first, that’s mean 5 squares in a row. And attached 2 more rows in the same direction like these
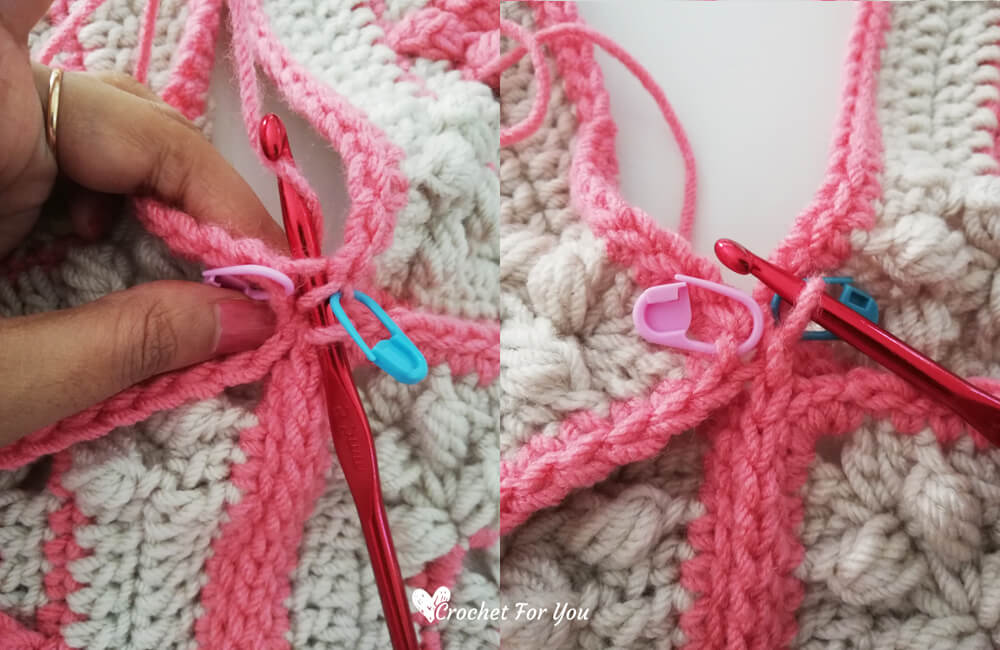
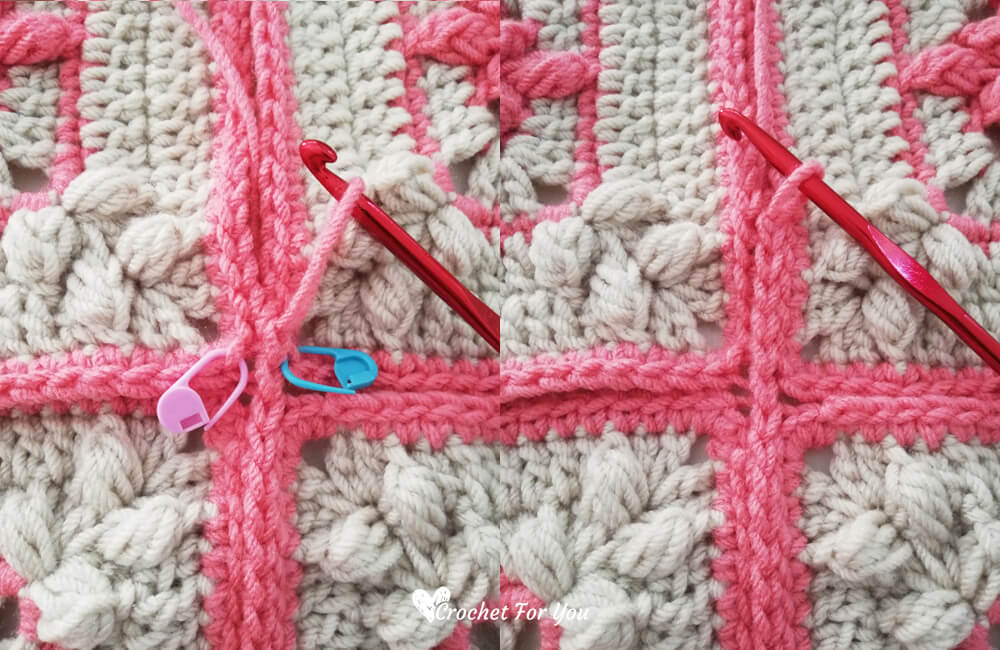
Repeat these steps on unjoined sides and complete blanket by joining all the squares.

Watch the video tutorial
See you next week with the final part!
Hope to see you soon with a new FREE pattern
Until then, Happy Crocheting!!
Share your finished projects of this pattern on Crochet For You FB page.
Happy hooking with Crochet For You!!
Let’s connect and share
Facebook | Pinterest | Twitter | Instagram
All contents include photography and patterns are copyrighted Crochet For You by Erangi Udeshika.
Do not copy, edit, distribute or republish patterns and images in this blog in part or whole as your own. Please, share a direct link to the pattern with others and anywhere else. You are welcome to make and sell finished items using my patterns.
Visit Copyright / Terms of use for more info. Thank you.